Another two-day workshop about microcontrollers, soldering and Tinusaur

Another two-day workshop about microcontrollers, soldering and Tinusaur

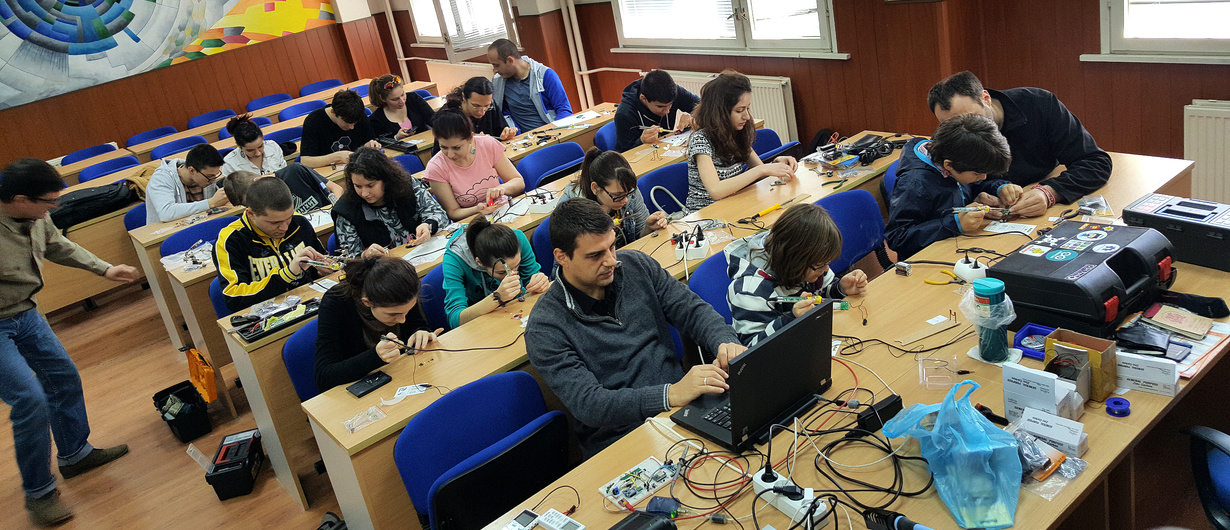
There was another “Microcontrollers, soldering and Tinusaurworkshop in our town of Veliko Tarnovo, a few days ago.

On the first day, we assembled some boards, the second day we wrote some programs.

For the younger kids, there were much simpler things to do – soldering blinking LED with 2 transistors, a few other components, and a battery.

Day 1

Just assembling various boards.

Tinusaur Board

This is the Tinusaur Board from the Tinusaur Starter 2 kit.

Tinusaur Board Parts

It wasn’t difficult for anyone to do that. There are markings on the PCB that tell you where to put each component and in what direction.

The only important thing to know is that you solder the RESET button last, before that you solder the battery socket on the bottom side of the PCB.

Tinusaur Shield LEDx2

This is the Shield LEDx2 from the Tinusaur Starter 2 kit.

Tinusaur Shield LEDx2 Parts

This shield is an upgrade from the previous Tinusaur Starter where we had to solder the LED and the resistor to a tiny 2-pin male header. With the shield is so much easier and fun.

LED Matrix 8×8 with MAX7219 Controller

This is a LED matrix 8×8 with a MAX7219 controller.

LED Matrix 8x8 MAX7219 Controller

That was something new. They sell on eBay at a very affordable prices: http://www.ebay.com/itm/191736585164

Even while we’re soldering it people were coming with ideas about what we could do with it.

Day 2

The second day was dedicated to programming what we’ve assembled the previous day.

Software and Arduino IDE Setup

That’s how we started day 2.

A short guide about how to setup the Arduino IDE to work with the Tinusaur boards is available at the Arduino IDE Setup page.

Blinking LED

The “Hello, World!” in the microcontrollers’ world.

Source code available at https://bitbucket.org/tinusaur/tutorials/src/default/tut004a_blinking_leds/.

A separate blog post and tutorial page will be available soon.

LED Matrix 8×8

The biggest challenge here was to make the MAX7219LED8x8 library work in the Arduino IDE environment.

We’ll do another post about that in the next few days.

UPDATE 2022: The MAX7219LED8x8 library, now renamed to MAX7219tiny has now a new home at tinusaur.com/libraries/max7219tiny. Check also this MAX7219 & ATtiny85 tutorial to learn how the library works.

Tinusaur Starter and Tinusaur Board are Available for Preorder

As you already know we ran out of all the kits at our online store and because we also received a lot of questions when the Tinusaur Starter and Tinusaur Board will be available we decided to allow you to preorder them. This way we’ll know how many of you are actually interested in buying so we’ll order the necessary quantities from our suppliers.

If you decided to preorder please should allow us between 2 and 3 weeks to get all the parts from our suppliers.

If you find The Tinusaur Project useful we would really appreciate you considering a small donation. Please look at the right side bar for more information.

Thank again for you interest and support.


Small changes on the board

Some of the people who received the Tinusaur Starter kit wrote us that it isn’t that easy to figure and remember how to put and use the 2 small 2×1 headers for the external power and the battery on/off. So, we decided to make a small change – have those in different colors.

Tinusaur Starter Kit Assembled

PS1 (external power source) is now red.

BS1, BJ1 (battery switch and jumper) are now yellow.


Your feedback is really valuable to us.


The Tinusaur Online Store Opens

Tinusaur Starter

Finally, our online store is up and running.

We received some emails asking if we could offer the boards and the parts for purchasing … so we did it. We have to admit that it took us some time to arrange everything but some of the circumstances were beyond our control.

At the moment we have only one product listed – that’s the Tinusaur Starter.

Go to this tinusaur.storenvy.com/products/6076006-tinusaur-starter link if you’d like to buy it.

Tinusaur Starter Buy at Storenvy

We have put up for sale very small batch of those starter kits as we don’t know what the interest will be. Please note that at the moment we don’t do this as a business and we do not make any profit – the sale only covers our expenses.

More information about the Tinusaur Starter kit is available at the Tinusaur Starter page.

IMPORTANT: This is offered as a kit which means that you have to assemble it yourself.

We chose Storenvy for our shopping site and we think that it was a good choice – it’s easy to setup and use but also provides all the functionality that we need at this stage. You can pay for your orders with PayPal.


All parts and boards arrived

Tinusaur PCB boards by OSHPark

Dear friends, I’m glad to inform you that all the parts and the boards finally arrived.

So we’re ready to offer the Starter Kit to those that are interested.

Boards were produced by OSHPark – they look great, as usual.

Tinusaur PCB boards by OSHPark

We also received a small batch from SeeedStudio – cheaper but still looks good.

We are now preparing the purchasing option – a PayPal button or may something more complex – we haven’t decided yet. There is this “Start your own online store front” list of options that we consider looking at. Any feedback or shared experience we will appreciate very much.

Initially, we will put up for sale a very small batch – 20 or so packages – we don’t know what the interest will be, but we have the capacity to ship about 80 more.


Tinusaur Starter: We are making a beginners kit

Tinusaur Starter Kit

To start making things with the Tinusaur you need the board, the parts, a programmer with a cable and couple of LEDs to make your first blinking lights program for ATtiny85 microcontroller.

Tinusaur Starter Kit for Beginners PartsWe’re ordering the PCBs and the parts from the manufacturers and it seems that the total cost for the full package will be 8 to 9 USD. Once we have everything here we’ll run a small test sale to see what’s the interest in the kit. The estimated cost for delivery of the kit to any country in the world is about 2 USD. So the total cost to get it would be 10 to 11 USD – very affordable for everyone.

Here is a list of everything that will be included in the Tinusaur Starter:

Name Description
PCB Tinusaur Board
MCU, Attiny85 Atmel AVR ATtiny85 microcontroller
Socket, DIP-8 DIP-8 socket for MCU
H1, Header Header 2×4, Female
H2, Header Header 2×5, Female
ISP, Header Header 2×5, Male, for ISP
RESET, Button Tactile push button, for RESET
Power, Header Header 1×2, Male, for external power
Battery, Header Header 1×2, Male, for battery power on/off
Battery, Jumper Jumper, 2-pin, for battery power on/off
C1, Capacitor Capacitor 100uF, Low profile 5×5 mm
C2, Capacitor Capacitor 100nF, Small
R1, Resistor Resistor 10K, Small, 1/8W
Battery holder Battery holder for CR2032
Battery 3V Battery 3V, CR2032
LED1 LED, 3mm, red
LED2 LED, 3mm, green
Resistor (LED1) Resistor 330 ohm, Small, 1/8W, for LED
Resistor (LED2) Resistor 330 ohm, Small, 1/8W, for LED
Header (LED1) Header 1×2, Male, for LED
Header (LED2) Header 1×2, Male, for LED
ISP Programmer USB ASP, with 10-pin connector and cable
Packaging Packaging bag, plastic

Check more often Twitter, Facebook, Google+ and The Tinusaur Project site for news about this kit.