
There was another “Microcontrollers, soldering and Tinusaur” workshop in our town of Veliko Tarnovo, a few days ago.
On the first day, we assembled some boards, the second day we wrote some programs.
For the younger kids, there were much simpler things to do – soldering blinking LED with 2 transistors, a few other components, and a battery.
Day 1
Just assembling various boards.
Tinusaur Board
This is the Tinusaur Board from the Tinusaur Starter 2 kit.
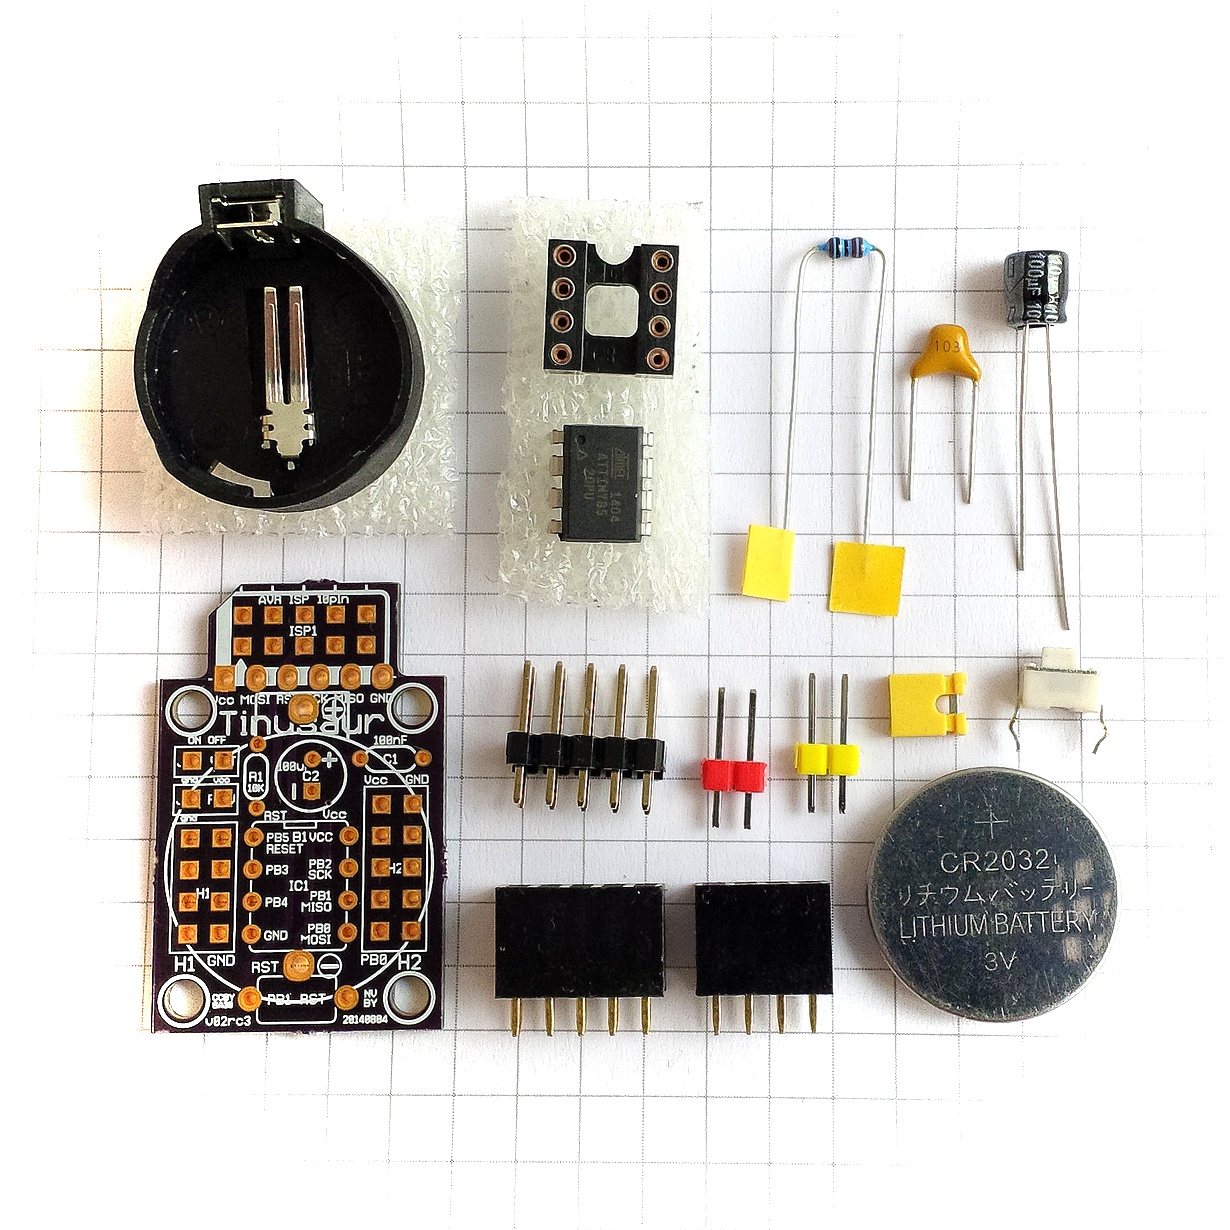
It wasn’t difficult for anyone to do that. There are markings on the PCB that tell you where to put each component and in what direction.
The only important thing to know is that you solder the RESET button last, before that you solder the battery socket on the bottom side of the PCB.
Tinusaur Shield LEDx2
This is the Shield LEDx2 from the Tinusaur Starter 2 kit.
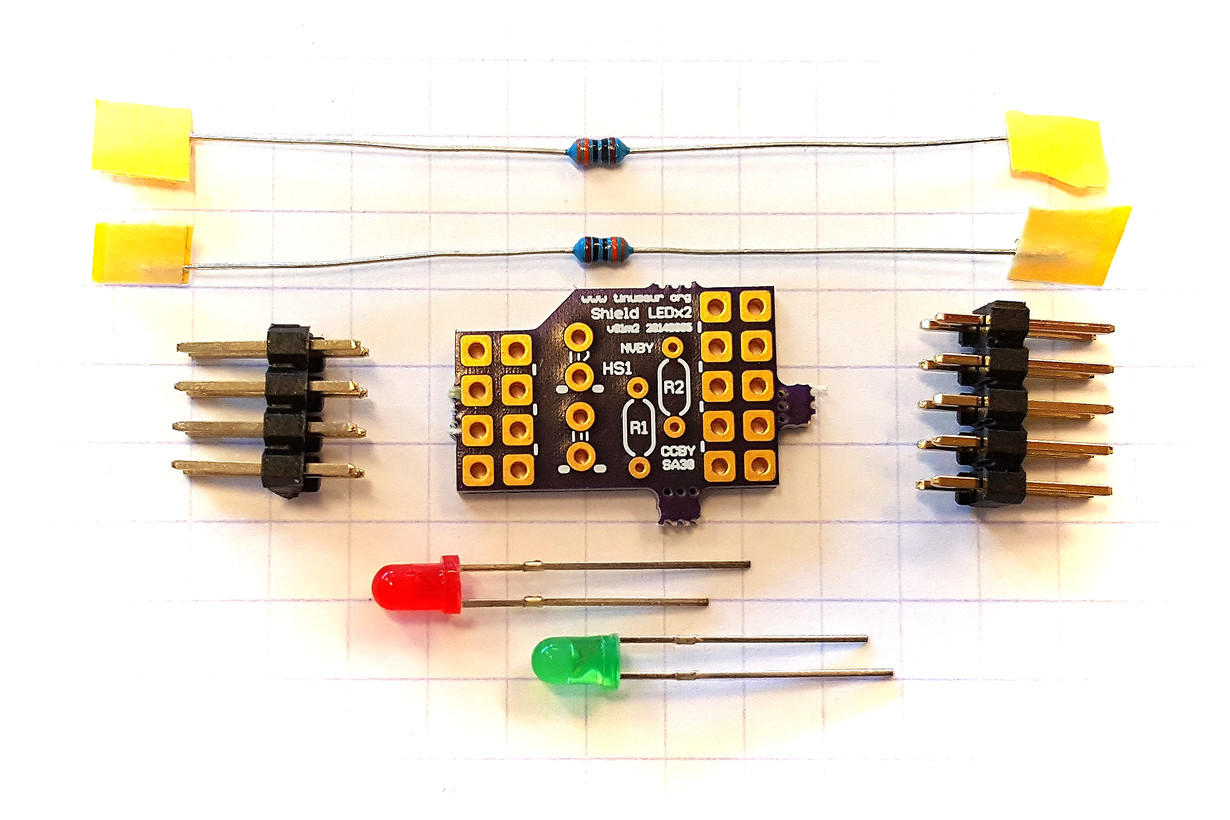
This shield is an upgrade from the previous Tinusaur Starter where we had to solder the LED and the resistor to a tiny 2-pin male header. With the shield is so much easier and fun.
LED Matrix 8×8 with MAX7219 Controller
This is a LED matrix 8×8 with a MAX7219 controller.
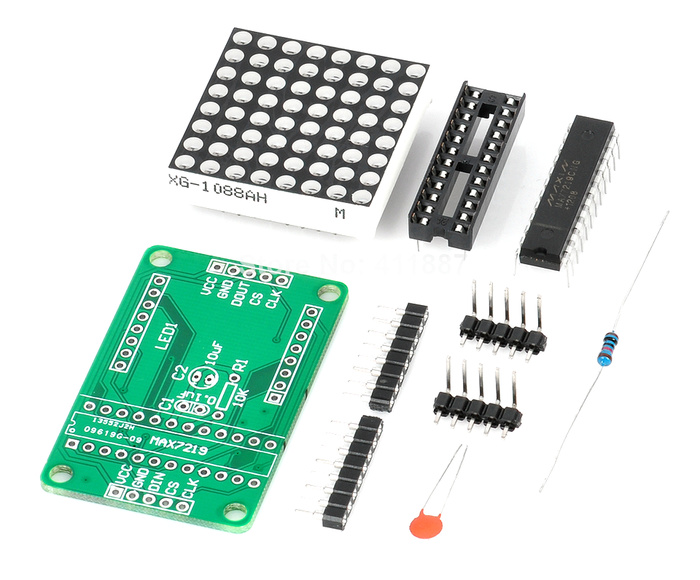
That was something new. They sell on eBay at a very affordable prices: http://www.ebay.com/itm/191736585164
Even while we’re soldering it people were coming with ideas about what we could do with it.
Day 2
The second day was dedicated to programming what we’ve assembled the previous day.
Software and Arduino IDE Setup
That’s how we started day 2.
A short guide about how to setup the Arduino IDE to work with the Tinusaur boards is available at the Arduino IDE Setup page.
Blinking LED
The “Hello, World!” in the microcontrollers’ world.
Source code available at https://bitbucket.org/tinusaur/tutorials/src/default/tut004a_blinking_leds/.
A separate blog post and tutorial page will be available soon.
LED Matrix 8×8
The biggest challenge here was to make the MAX7219LED8x8 library work in the Arduino IDE environment.
We’ll do another post about that in the next few days.
UPDATE 2022: The MAX7219LED8x8 library, now renamed to MAX7219tiny has now a new home at tinusaur.com/libraries/max7219tiny. Check also this MAX7219 & ATtiny85 tutorial to learn how the library works.