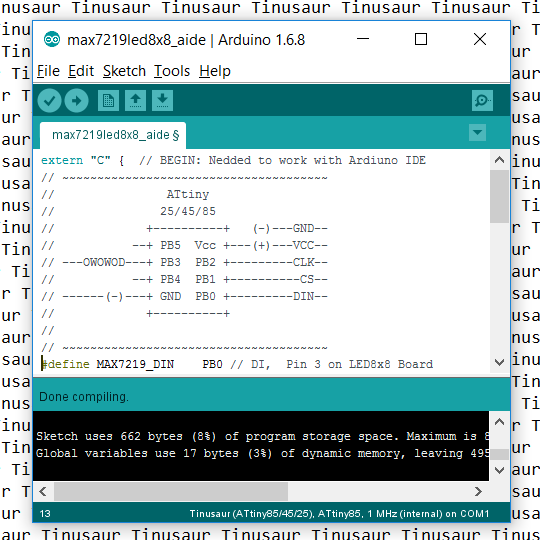
UPDATE: There is an updated version of the Arduino Setup Guide at our new website https://tinusaur.com/guides/arduino-ide-tinusaur-setup/
This is a short guide how to setup the Arduino IDE to work with the Tinusaur boards.
What it does basically is to make it work with the Atmel ATtiny85/45/25 microcontrollers. The only difference is that it will appear on the list of boards as Tinusaur – this is done for convenience, so relatively inexperienced people won’t get confused by the long list of unknown boards and microcontrollers.
Installing the Arduino IDE
First of all, we need the Arduino IDE itself. It could be downloaded from https://www.arduino.cc/en/Main/Software – the official Arduino website. The current version at the time of writing this guide was 1.6.8 but should work with all the most recent versions.
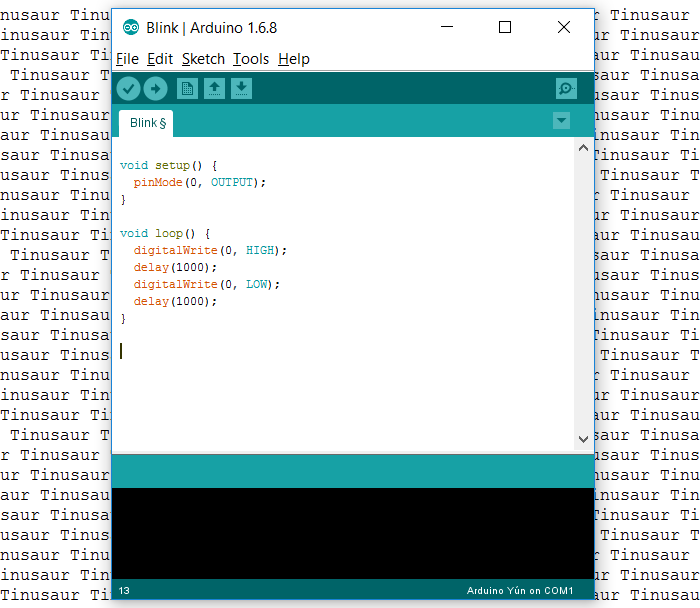
Start the Arduino IDE.
It should look similar to this …
Adding Support for the Tinusaur Boards
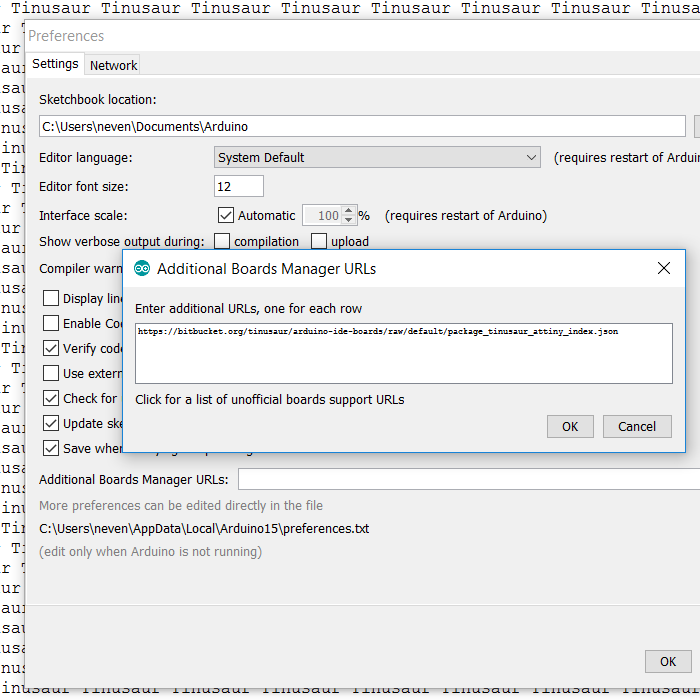
Go to the menu File / Preferences.
Find the “Additional Boards manager URLs” and the button on the right that will open an edit box.
Put the following URL in the edit box:
https://bitbucket.org/tinusaur/arduino-ide-boards/raw/default/package_tinusaur_attiny_index.json
NOTE: It is possible to have multiple URLs as long as they are put on separate lines.
Close the edit dialog by pressing “OK”.
Close the “Preferences” dialog by pressing “OK”.
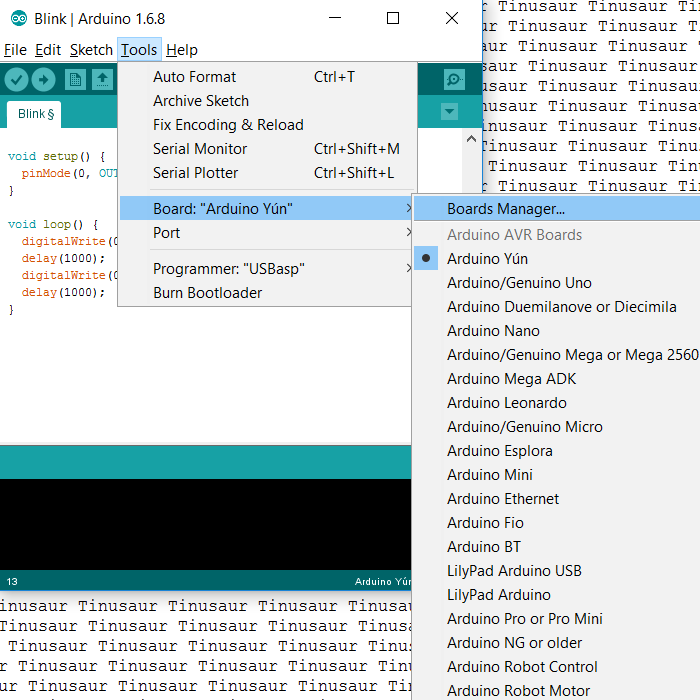
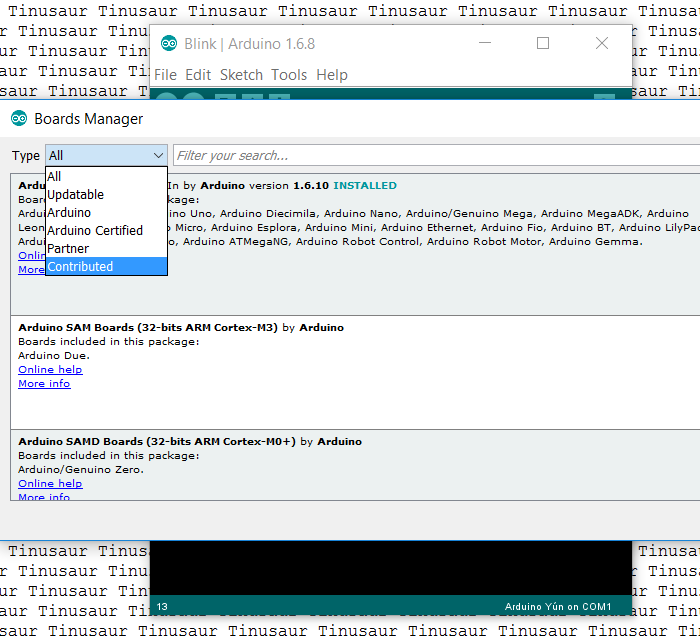
Go to the menu Tools / Board:… / Boards Manager.
This will open an additional dialog window with boards information.
You may need to wait until all data is loaded.
From the drop-down menu “Type” choose the “Contributed” item.
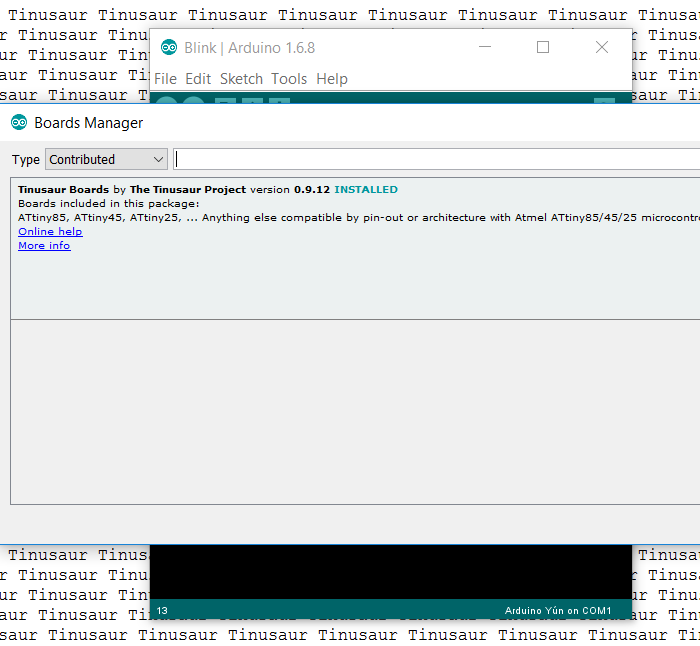
Locate the “Tinusaur Boards” item and click on it.
Press the “Install” button. That will install the necessary files into the Arduino IDE.
Close the dialog by pressing the “Close” button.
Setup to use the Tinusaur Board
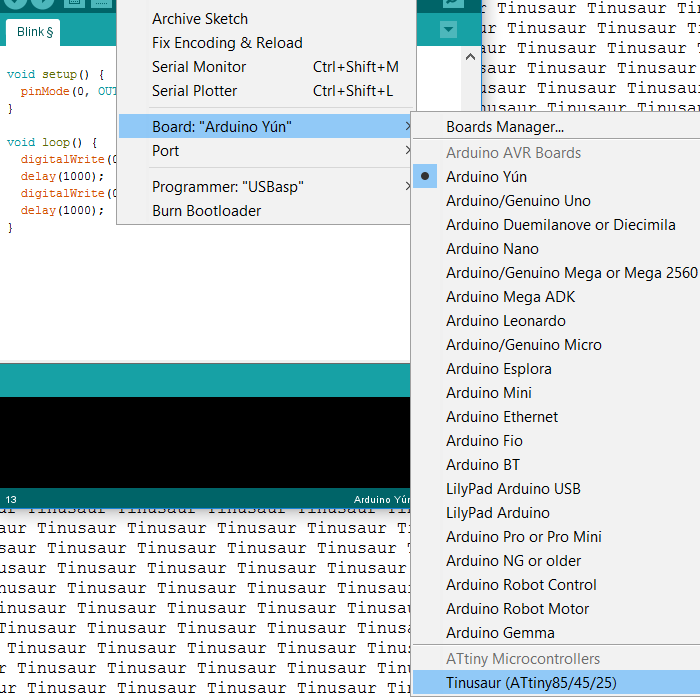
Go to menu Tools / Board:…
The Tinusaur should be available somewhere at the bottom of the list. Choose the Tinusaur.
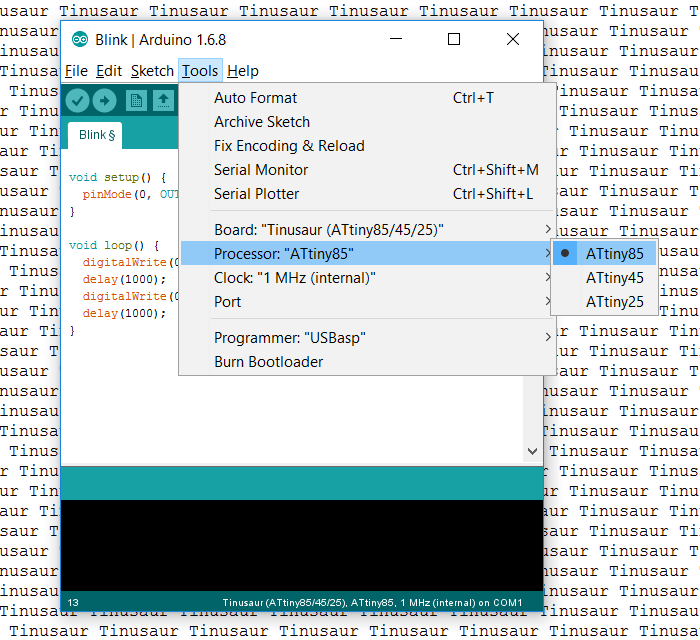
It is important to setup the other parameters for the board.
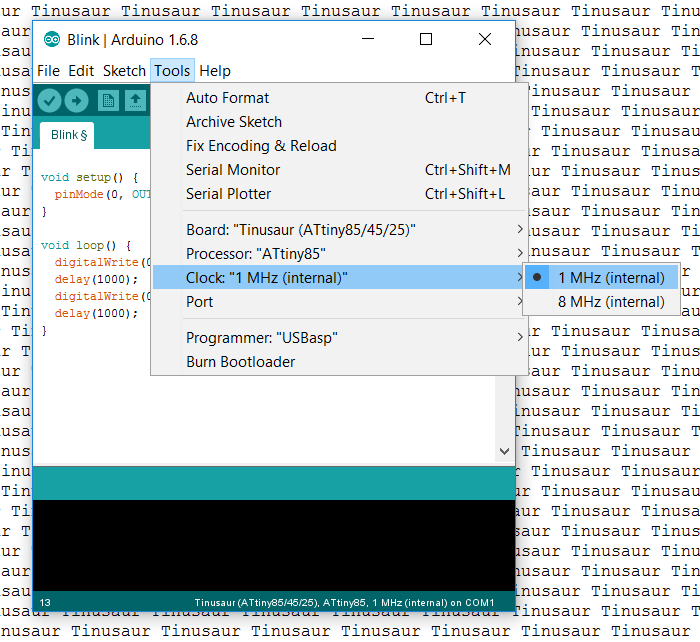
Go to menu Tools / Processor:… and choose the appropriate CPU type. If unsure choose ATtiny85.
Go to menu Tools / Clock:… and choose the appropriate CPU frequency. If unsure choose 1 MHz.
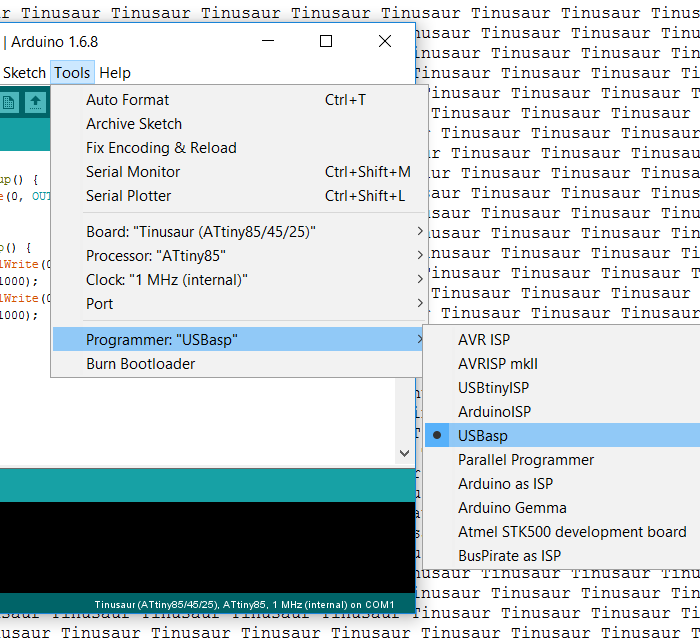
Go to menu Tools / Programmer:… and choose the appropriate programmer. If unsure choose USBasp.
That’s it.
Enjoy!

