Short Video about the Tinusaur Project

The Tinusaur Project

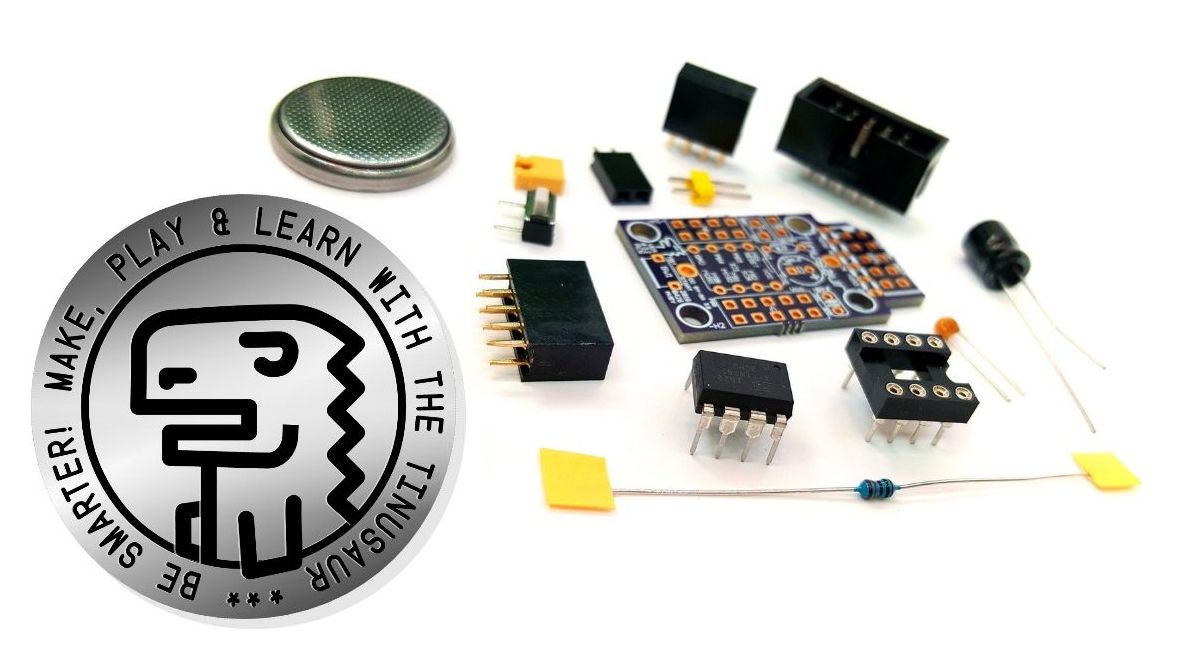
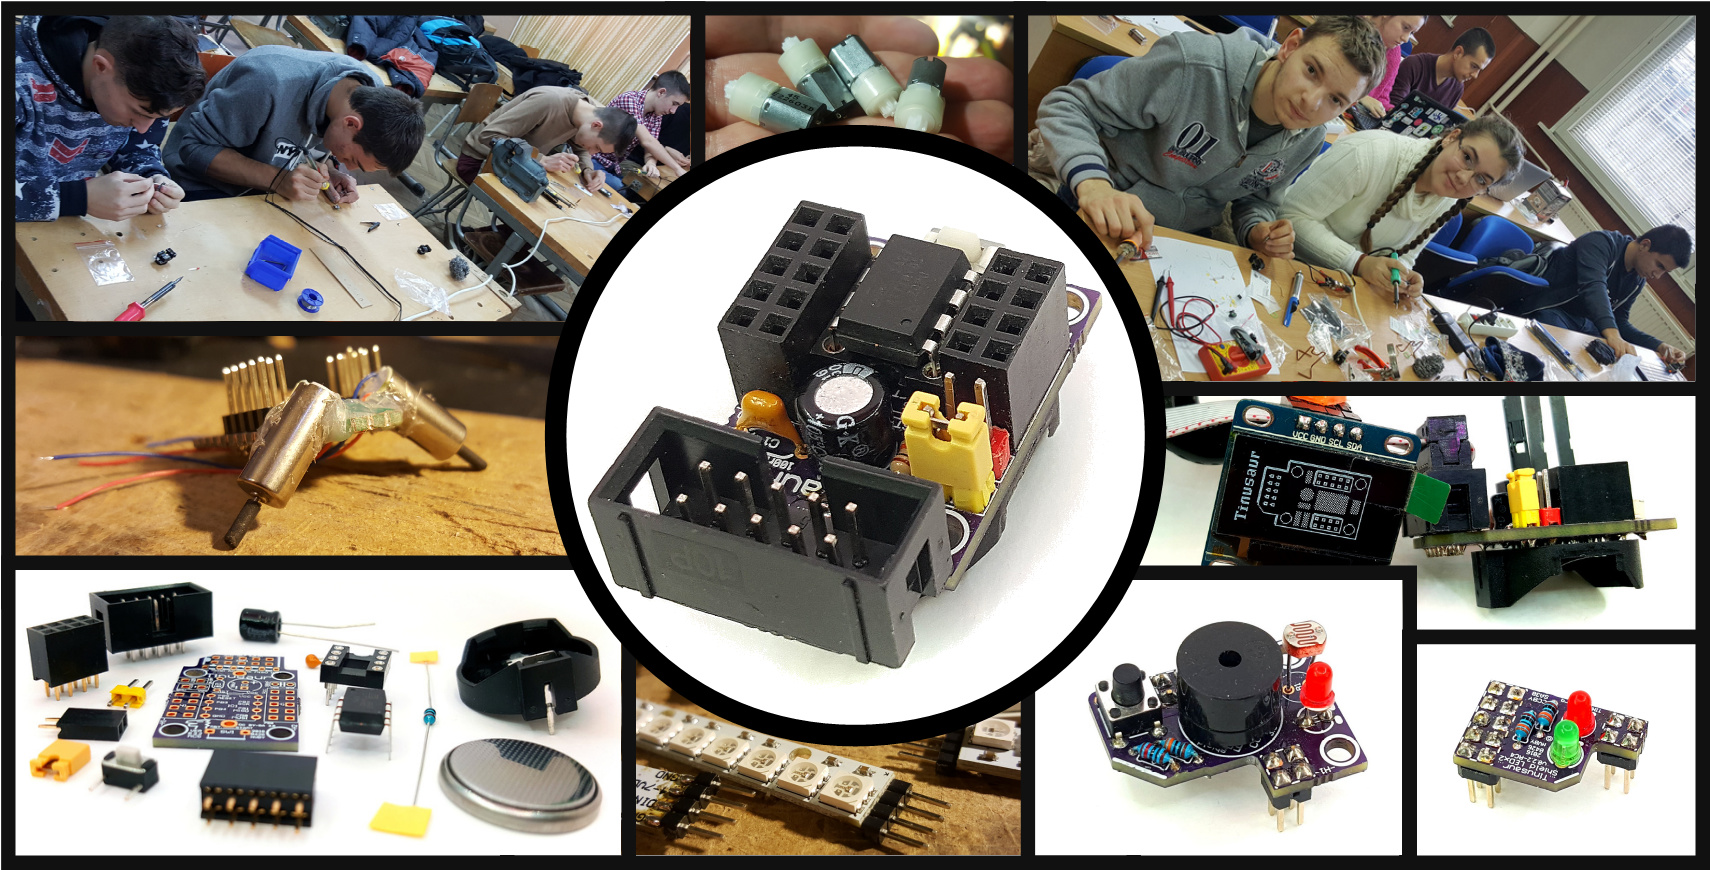
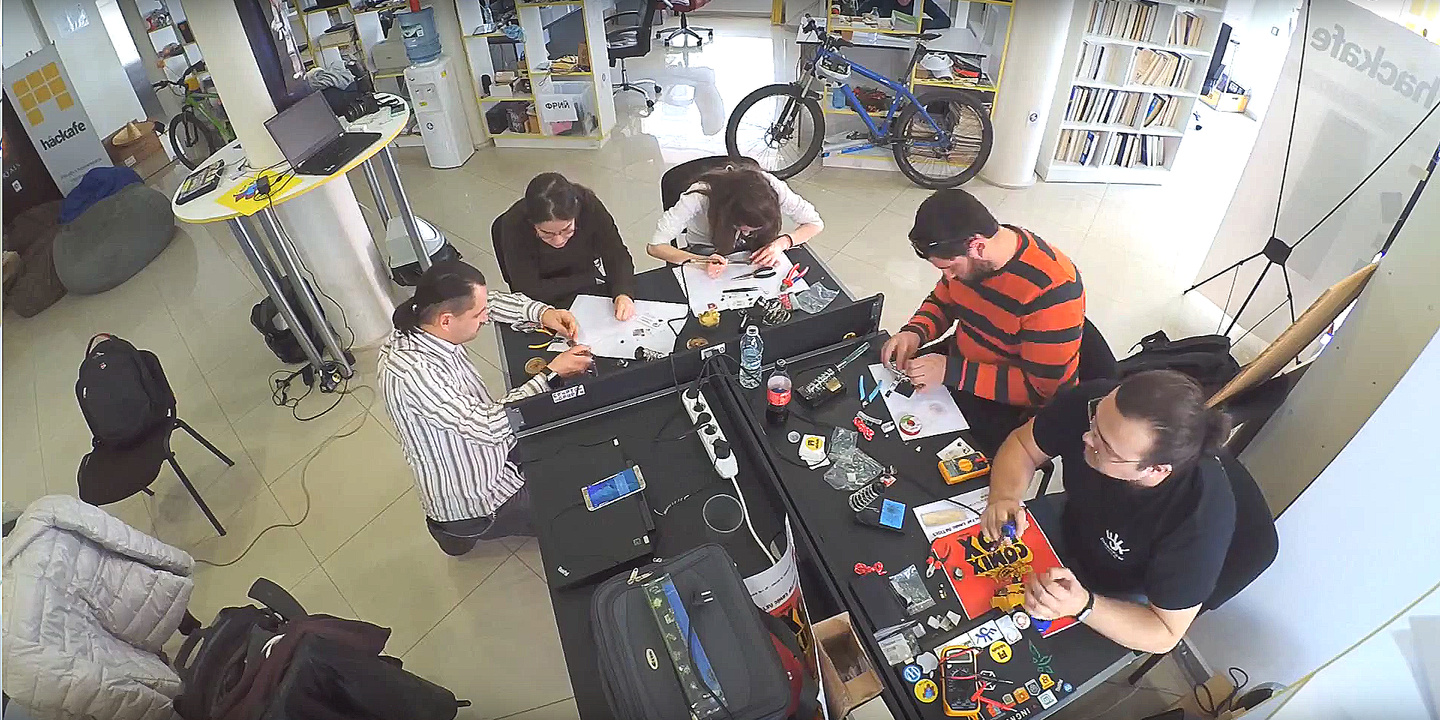
This is a short 2-minute video explaining what is the Tinusaur project about, who is it good for and what you could do with its microcontroller and shield boards.

The Tinusaur is a small microcontroller board with a tiny chip on it.

The Tinusaur board is powered by the popular Atmel ATtiny85 microcontroller. It comes as an assembly kit: a small package with parts – you get the chance to learn how to solder it. Don’t worry, it isn’t that complicated. This circuit is so simple that there are very few things that could go wrong.

Once your mainboard is ready you could start learning by making and playing using our shield boards.

Our shield called LEDx2 has 2 LEDs – Green and Red. It comes also in parts, so you have to assemble it yourself. You can make its LEDs to blink. For example: like the traffic lights.

Want to do more?

We also have the EDUx4IO shield designed primarily for education. It has 4 different components on it: LED, Buzzer, Button, Photoresistor. With the LED and the Buzzer, you have 2 ways to output digital and analog signals. With the Photoresistor and the Button, you have 2 ways to input digital and analog signals.

There is also temperature sensor built into the ATtiny85 microcontroller chip.

Workshop: Assembling the Tinusaur Kit in Varna, Bulgaria

Tinusaur Workshop VarnaLab Varna Bulgaria

This Saturday, September 2nd, we will have one day workshop for assembling the Tinusaur kits for those who supported our Indiegogo crowdfunding campaign. It will take place in Varna, Bulgaria, our host will be VarnaLab – the local hackerspace.

Tinusaur Board Parts

We will learn the basics of electronic components, microcontrollersATtiny85 in particular and, of course, how to solder.

We will bring to the workshop soldering irons and all the necessary materials to do the job. Also, for those who were not able to get one of the kits during our Indiegogo campaign, we will have some for sale.

Tinusaur Workshop

At the moment we can organize such workshops only in Bulgaria but we’d really like to start doing this in other countries. Volunteers are very welcome. 🙂

This is the Facebook event: https://www.facebook.com/events/842138465944360/
If you’re around, you’re welcome to come.


Where is the breadboard?

Tinusaur Boards Pinout

You may ask “How am I going to connect the Tinusaur Board to a breadboard for a quick start or prototyping?”.

Well, in most cases you won’t need a breadboard and the reason for that is the way the Tinusaur Board has been designed with 2 2-row headers that give you enough pins to do some prototyping directly on the board.

Tinusaur Boards Pinout

The 2 outer rows are always GND while the 2 inner rows are always signal (except when they duplicate the GND), and the Vcc is inner as well. On the newer version of the board, there is also e separate 2-pin (female or male) external power connector. The board could be powered by a coin cell battery as well or directly through the USBasp programmer. So, with 18+2=20 pins in total, it is more like a tiny breadboard where you can stick some wires or even some parts. Pretty neat, isn’t it?

If you’re not ready yet to prototype your own circuit you can use some of the shields we’ve got. To learn how to make a LED blink you could use the Tinusaur Shield LEDx2 or the upcoming Tinusaur Shield LEDx3. For more advanced topics you could use the Tinusaur Shield EDUx4IO that can help you learn how to work with buttons, produce sounds with a buzzer, read analog data such as light intensity using a photoresistor, and many other things.

So, do I need a breadboard for prototyping?

  • The answer is NO, you don’t need a breadboard in most cases.

Where is the Tinusaur project used?

Tinusaur Workshop

The Tinusaur Project is used in schools, universities, and clubs around the world.

In Formal Education

The Tinusaur Project is already getting traction in the field of the Formal learning.

In 2016 it was considered and later officially selected as the platform for the “Microcontrollers and embedded devices” class in St. Cyril and St. Methodius University of Veliko Tarnovo, in Bulgaria. It is now part of the curriculum. As part of that effort, we ran a quick funding campaign and successfully collect all the funds necessary to produce Tinusaur Starter EDU PLUS for each student so they can have on for free, assemble, program, and take them home. It was a huge success – all the students loved it.

Tinusaur Workshop in the University

In 2016, as part of a government-funded initiative “Tvoyat Chas” (in Bulgarian, eng.: “Your Class”) the Tinusaur Project was considered and later chosen as one of the kits to be used for high school students – age between 15 and 17. They just loved it.

In Informal Learning

Tinusaur Project Workshop UNI4KIDS

The Tinusaur Project is very popular in the field of the Informal learning for it is very affordable, easy to learn and work with.

In 2016 as part of a summer school of science organized by UNI4KIDS the Tinusaur Project was used in the electronics, microcontroller and robotics classes. Children of ages between 11 and 17 had the chance to learn how to solder, assemble their very first microcontroller board and program it. It was an incredible experience to work with such smart and motivated young people.

The Tinusaur Workshops

Since 2014 we’ve been organizing 1 or 2-day training workshops where people could get a Tinusaur kit, learn how to solder and assemble it, and write their first microcontroller programs.

Another two-day workshop about microcontrollers, soldering and Tinusaur
Another two-day workshop about microcontrollers, soldering, and Tinusaur

Gifts

On quite a few occasions colleagues of ours bundled Tinusaur Starter 2 kits as part of event gifts or prizes. What a great idea to give something to people that they can use to improve their knowledge and skills.

By Hobbyists

The last on the list but with the highest slice of the pie are the hobbyists. The number of boards we’ve shipped worldwide will soon reach the number 2000 and most of them go to people who would like to learn and make things with microcontrollers and create internet-of-things. The Tinusaur is the perfect start.

Supporters

We ran 2 Indiegogo crowdfunding campaigns. One – very successful, and the other one – semi-successful. That helped us a great deal. First, it proved that the Tinusaur project is something that people like and want to use, and second, it allowed us to start the production on a bit larger scale.

What’s Missing?

We would like, with the help of sponsors, to be able to send Tinusaur kits in parts of the world where people may not be able to afford to buy them. The Tinusaur is very, very inexpensive but still … it may not fit in the budget for some people.

So, if you’d like to help please get in touch with us. We’re open for ideas.

What is the Tinusaur project about?

About Tinusaur Project Step-by-step

What is the Tinusaur project about?

Here we will explain it to you step-by-step.

About Tinusaur Project Step-by-step
The Tinusaur hardware consists of few small boards with some electronic components on top.
They come as assembly kits – small packages with parts.
The Tinusaur main board is powered by the Atmel ATtiny85 microcontroller.
About Tinusaur Project Step-by-step
The Tinusaur board comes in parts, all in a small plastic bag, you get the chance to learn how to solder.
About Tinusaur Project Step-by-step
Don’t worry – it isn’t that complicated – we’re preparing some videos that will walk you through the process. Check the Guides pages for more information.
About Tinusaur Project Step-by-step
Once your main board is ready you could use some of our add-on boards, also known as “shields”, to add functionality to your microcontroller system.
About Tinusaur Project Step-by-step
The Shield LEDx2 board comes in parts, like the main board, you have to assemble it yourself, but it isn’t very complicated.
About Tinusaur Project Step-by-step
Once you’ve assembled your first boards, you can write your first program.
About Tinusaur Project Step-by-step
The simplest program you can write is the blinking LED. That is the “Hello World” of the microcontrollers.
Next step – little challenge: make both of the LEDs blink.
About Tinusaur Project Step-by-step
The Tinusaur Shield EDUx4IO board comes in parts too, like the other boards, you have to assemble it yourself, and it isn’t complicated at all.
About Tinusaur Project Step-by-step
Once you’ve assembled your board, you can write more interesting programs.
About Tinusaur Project Step-by-step
This shield gives you more options and lets you learn more things.
About Tinusaur Project Step-by-step
There are 4 different components on it: LED, Buzzer, Button, Photoresistor.
About Tinusaur Project Step-by-step
Making the LED blink is a good start.
About Tinusaur Project Step-by-step
The next step is to make the buzzer produce some sound.
About Tinusaur Project Step-by-step
You can use the button to learn how to read the input data and make your code do different things when you press it.
About Tinusaur Project Step-by-step
The photoresistor is a component that changes its electrical conductivity depending on the intensity of the light that is applied to it. In other words, you can measure the light intensity with the photoresistor.
About Tinusaur Project Step-by-step
The LED could work in on/off mode but it could also fade-in and fade-out using what’s called pulse-width modulation or PWM for short.
About Tinusaur Project Step-by-step
The buzzers could also work with PWM and that could be considered as analog mode i.e. it could produce sound with variable intensity.
About Tinusaur Project Step-by-step
You could combine all the 4 parts to achieve more interesting results. Like using the button to switch between various modes of your program, or use the photoresistor to trigger different event depending on the light intensity.
About Tinusaur Project Step-by-step
Now, an interesting trick. What if the LED emits some light, it reflects on an obstacle and goes back to the light sensitive element – our photoresistor. That is a proximity sensor that we’ve just created.
About Tinusaur Project Step-by-step
A feature “hidden” inside of the microcontroller is an internal temperature sensor. You could make LED blink or buzzer sound if the temperature goes above or below a certain value.
About Tinusaur Project Step-by-step
We created the Blocktinu platform that will allow you to start with the programming of your Tinusaur microcontroller system really quick.
With it, you could simply drag and drop some blocks to implement your algorithms.
About Tinusaur Project Step-by-step
The platform automatically generates the C source code.
And the best part is that you can start learning the C programming language just by looking at the generated source, change your blocks and see how the source code changes.
About Tinusaur Project Step-by-step
What else you could do with the Tinusaur project?
Well, it is up to you to bring your new brilliant ideas to life.
About Tinusaur Project Step-by-step
Check our website more often to see what new we’ve developed and added to the Tinusaur platform.

Introducing the BLOCKTINU – programming with blocks for the Tinusaur and ATtiny85

Blocktinu for Tinusaur

Dragging and dropping blocks on a web page that generates real C code which gets compiled on the cloud and then uploaded locally to your microcontroller.

Does that sound interesting to you?

Well, we’ve done it. Kind of. We called it Blocktinu.

A couple of weeks ago me (Neven Boyanov) and my friend Geroge (Georgi Marinov) participated in the #BG10xEU hackathon in Sofia and the idea that we developed and presented was just that. Within the given 24 hrs we managed to develop the initial version of most of the modules, including a browser extension for Google Chrome for handling the communication between the cloud and the local machine. At the moment the only missing part is the piece that invokes the avrdude from within the browser extension.

IMPORTANT: Please note that this is just the beginning and there is still work to be done.

We will have the source code (free and open) at this location: https://bitbucket.org/tinusaur/blocktinu.

UPDATE (2021): Bitbucket no longer hosts our projects. 🙁
Our source code is available at
— https://gitlab.com/tinusaur
— https://github.com/tinusaur (mirror)

The project will be located here: /projects/blocktinu/.

The Blocktinu is using the Blockly library for handling the block in a browser.

Below is a high-level architecture diagram.

Blocktinu for Tinusaur Architectural Diagram

PS: We did not get any prizes, the judges did not find the idea interesting enough. 🙁

Big fix: The Tinusaur Package for the Arduino IDE

Tinusaur Arduino IDE Package Bug Fix

UPDATE: There is an updated version of the Arduino Setup Guide at our new website https://tinusaur.com/guides/arduino-ide-tinusaur-setup/

We’ve recently discovered a bug in our Arduino IDE package that will cause an error when you try to compile your code.

We have a fix for it and the only thing you need to do is to update the package.

Here is how:

  1. Start your Arduino IDE
  2. Go to the menu Tools / Board … and then “Board Manager …” at the top.
  3. Wait for a while until the list is updated from the Internet.
  4. Scroll all the way down to the bottom until you see the “Tinusaur Boards“.
  5. Click on the item and see the “Update” button.
  6. Press the “Update” button.

Enjoy! 🙂

If you don’t have the package installed yet follow the instructions for setting up the Arduino IDE with the Tinusaur boards.

If you don’t have a Tinusaur board yet 🙂 go to our Indiegogo Campaign InDemand option and get one.


Indiegogo Campaign is Almost Halfway Through

Tinusaur Indiegogo Campaign

Last week we’ve launched our Indiegogo crowdfunding campaign and, as of a few minutes ago, we’ve reached 1/3-rd of our goal already. 🙂

In case you’re not familiar what the Tinusaur project is about …

A small board with a tiny chip on it that comes as an assembly kit – a small package with parts and you get the chance to learn how to solder it. This circuit is so simple that there are very few things that could go wrong. It’s been around for over 3 years and used in schools and universities to educate young people in both hardware and software. With this campaign, you could help us produce more of the Tinusaur boards, bring the cost down to $3 per basic “lite” board and allow more people to be able to get them.

Tinusaur Indiegogo Campaign

The Tinusaur boards are powered by the Atmel ATtiny85 microcontroller. You could program your Tinusaur board with the Arduino development environment, or if you chose so – using the plain old C/C++ compiler, or … using whatever you prefer.

The success of this campaign will help us produce our boards and kits in much larger quantities and bring the coast down. That will allow us to have the basic “lite” boards for as little as $3/pcs – that will make them available for even more people.

Help us spread the word – just share it. But, if you like the idea and the project, you could back us up. Here’s the link: https://igg.me/at/tinusaur.

Thanks in advance for your support.

How to Setup the Arduino IDE to Work with the Tinusaur Boards

Arduino IDE for Tinusaur Boards

UPDATE: There is an updated version of the Arduino Setup Guide at our new website https://tinusaur.com/guides/arduino-ide-tinusaur-setup/

This is a short guide how to setup the Arduino IDE to work with the Tinusaur boards.

What it does basically is to make it work with the Atmel ATtiny85/45/25 microcontrollers. The only difference is that it will appear on the list of boards as Tinusaur – this is done for convenience, so relatively inexperienced people won’t get confused by the long list of unknown boards and microcontrollers.

Installing the Arduino IDE

First of all, we need the Arduino IDE itself. It could be downloaded from https://www.arduino.cc/en/Main/Software – the official Arduino website. The current version at the time of writing this guide was 1.6.8 but should work with all the most recent versions.

Start the Arduino IDE first.


Adding Support for the Tinusaur Boards

Go to the menu File / Preferences.

Find the “Additional Boards manager URLs” and the button on the right that will open an edit box.

Put the following URL in the edit box:

https://bitbucket.org/tinusaur/arduino-ide-boards/raw/default/package_tinusaur_attiny_index.json

NOTE: It is possible to have multiple URLs as long as they are put on separate lines.

Close the edit dialog by pressing “OK”. Close the “Preferences” dialog by pressing “OK”.

Go to the menu Tools / Board:… / Boards Manager.

This will open an additional dialog window with boards information.

You may need to wait until all data is loaded.

From the drop-down menu “Type” choose the “Contributed” item.

Locate the “Tinusaur Boards” item and click on it.

Press the “Install” button. That will install the necessary files into the Arduino IDE.

Close the dialog by pressing the “Close” button.

Setup to use the Tinusaur Board

Go to menu Tools / Board:…

The Tinusaur should be available somewhere at the bottom of the list. Choose the Tinusaur.

It is important to setup the other parameters for the board.

Go to menu Tools / Processor:… and choose the appropriate CPU type. If unsure choose ATtiny85.

Go to menu Tools / Clock:… and choose the appropriate CPU frequency. If unsure choose 1 MHz.

Go to menu Tools / Programmer:… and choose the appropriate programmer. If unsure choose USBasp.

That’s it.

Another version of this guide but with screenshots is available at the Arduino IDE Setup page.

Our first workshop for this year

Tinusaur Workshop Soldering Plovdiv Hackafe

Our first workshop for this year took place couple of weeks ago in Plovdiv at Hackafe. It was part of a much larger event about microcontrollers, robotics and internet-of-things.

This time, it was for 2 days and in 3 parts.

Part 1 (day 1) was an introduction to the microcontrollers for everyone that was just starting – short 30 minutes presentation and then discussions about various problems that one may experience while working with input/output. It was interesting to see some observation by people that have no much experienced about buttons and the noise that they may produce, then … how do we do debouncing.

Tinusaur Workshop Plovdiv Hackafe

Part 2 (day 2) was soldering. Everyone got Tinusaur Starter 2 kit. No one had difficulties assembling the board – there’s no much you can get wrong with this board.

One of my friends shot a timelapse at one of the tables.

Part 3 (day 2) was the fun part.

We wrote the blinking LED program – that was easy.

Then we started experimenting.

As it is an old Bulgarian custom to wear Martenitsa in March we made some blinking ones with the Tinusaur.

We also managed to play polyphonic tunes using ELM – Wavetable Melody Generator.

But the most unusual thing we did was to make an old floppy disk drive play a melody.

Thanks to Vencislav Atanasov (https://github.com/user890104) for the idea.

The inspiration was from Moppy – the Musical Fl oppy by SammyIAm.


Oh, by the way, incase you’ve not heard it yet 🙂 …

Tinusaur Project Crowdfunding Indiegogo

We have recently launched a Tinusaur crowdfunding campaign at Indiegogo so if you like what we’re doing please support us at http://igg.me/at/tinusaur.