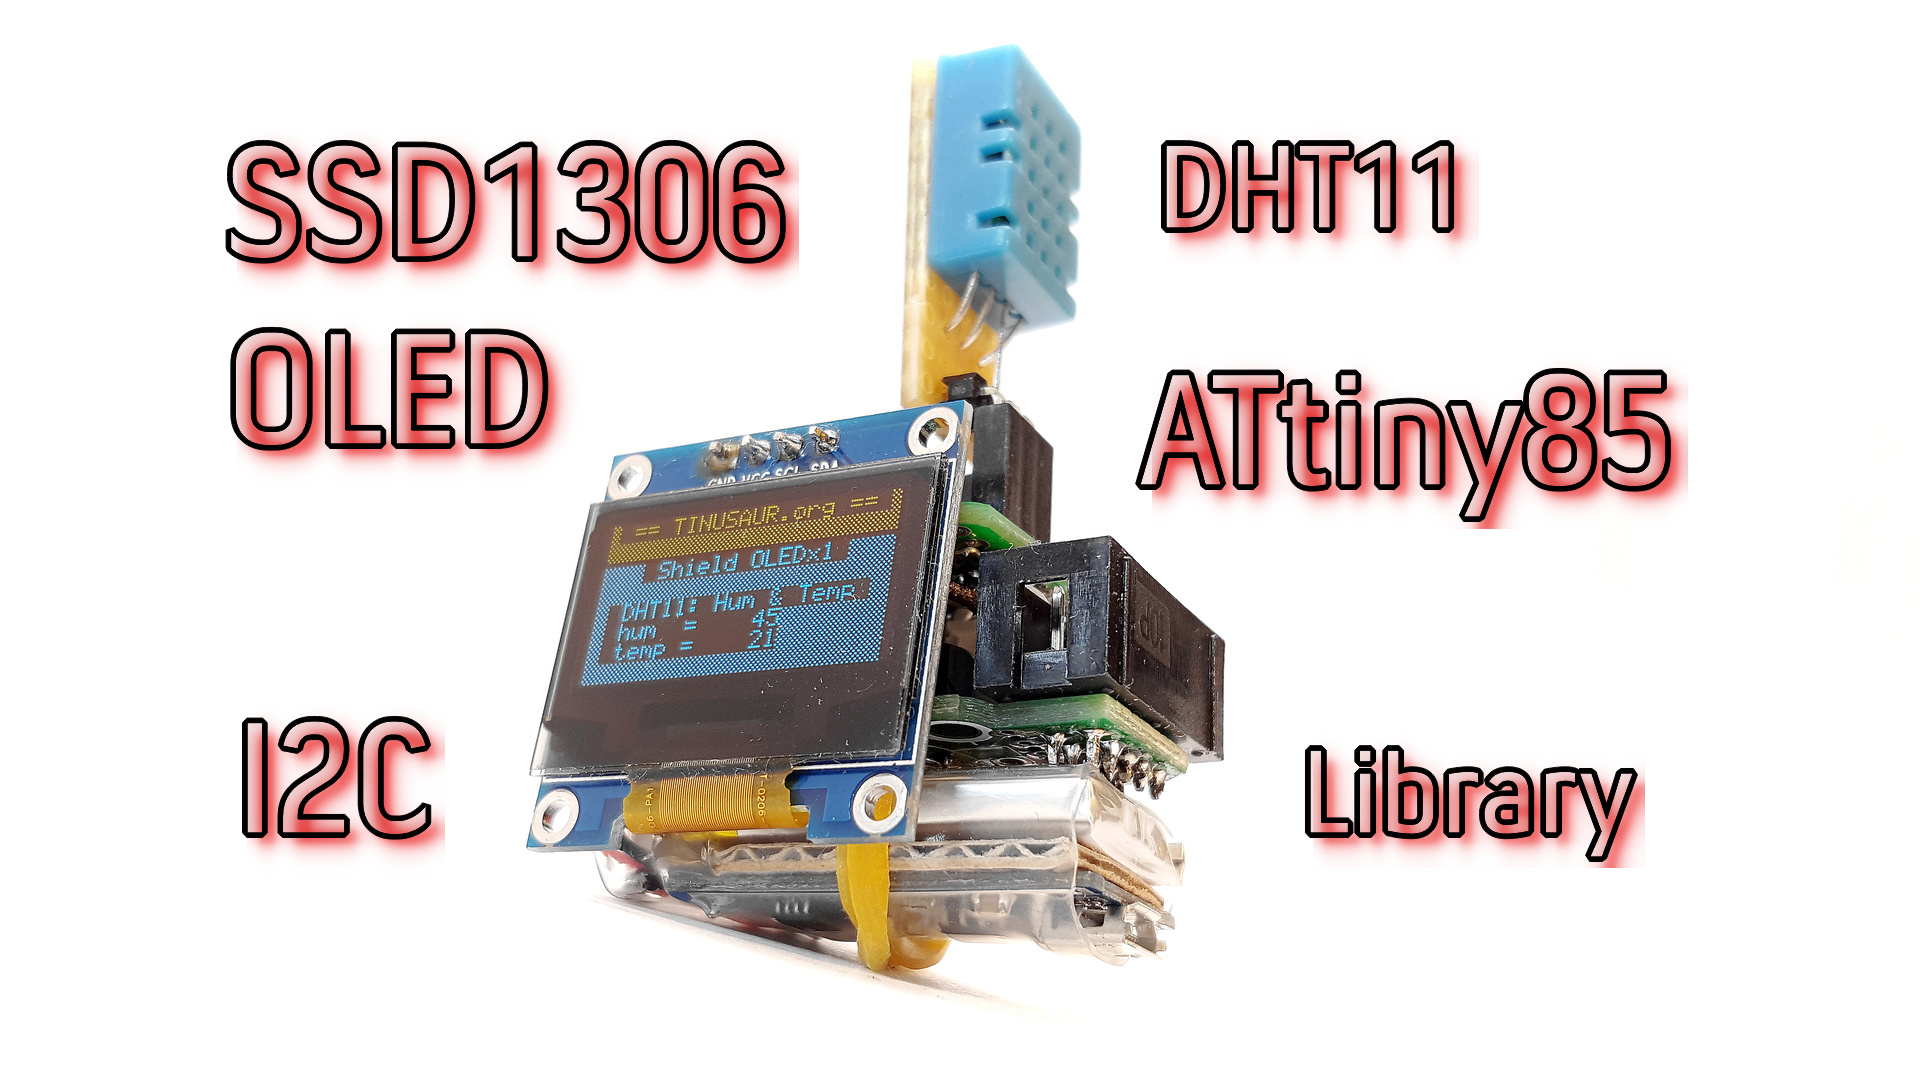
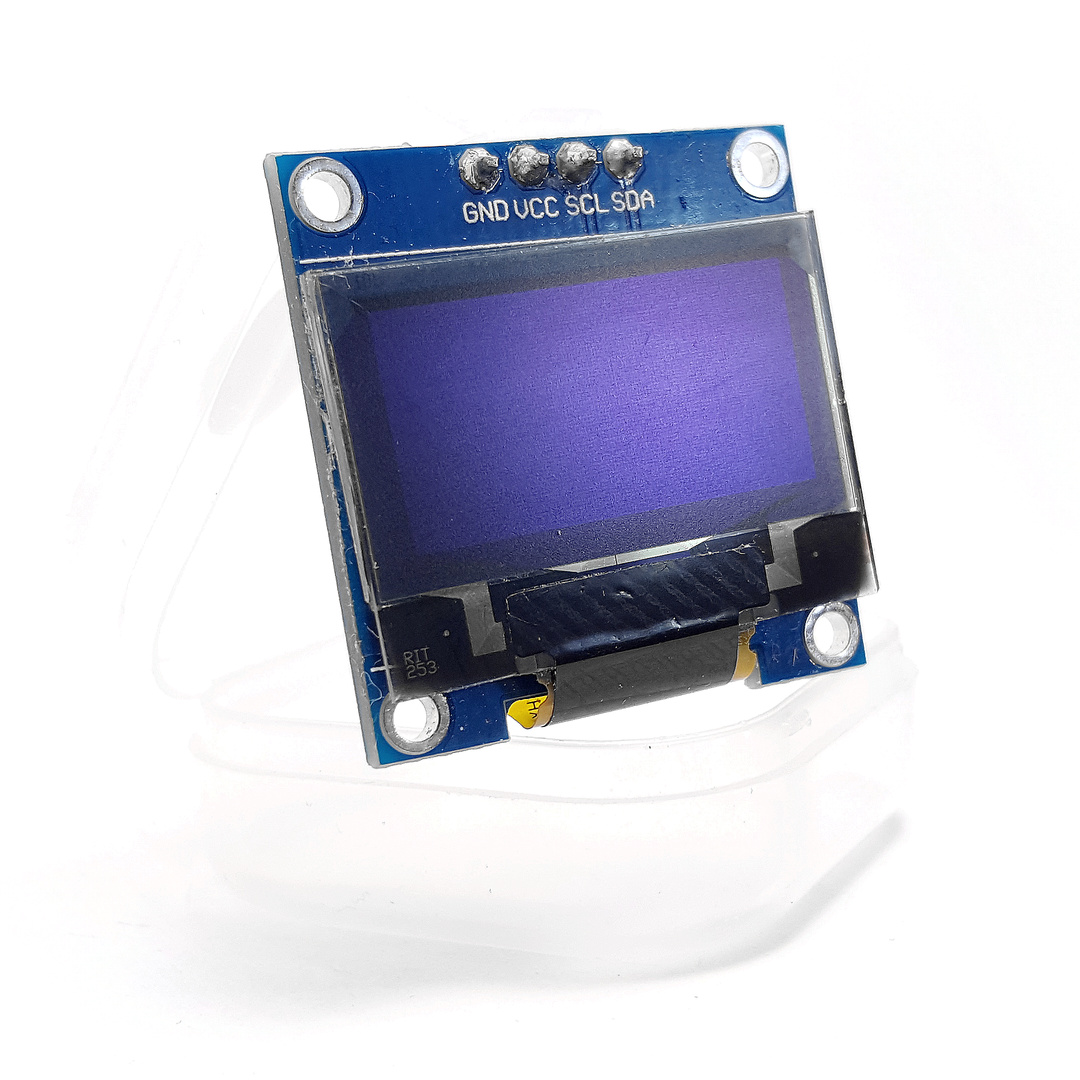
It isn’t hard to get one of those OLED displays from eBay or another place. They are usually controlled by SSD1306 chip – one of the most popular. Such displays could be used for a number of things – from just learning to control them and showing some text/numbers/graphics, display sensors’ data or even creating a small game.
Back in 2014, we wrote a small library for the ATtiny85 microcontroller to work with such displays and we called it SSD1306xLED after the name of the controlling chip for the display.
Here is a link to check what’s for sale now:
http://www.ebay.com / OLED 128 64
IMPORTANT DISCLAIMERS:
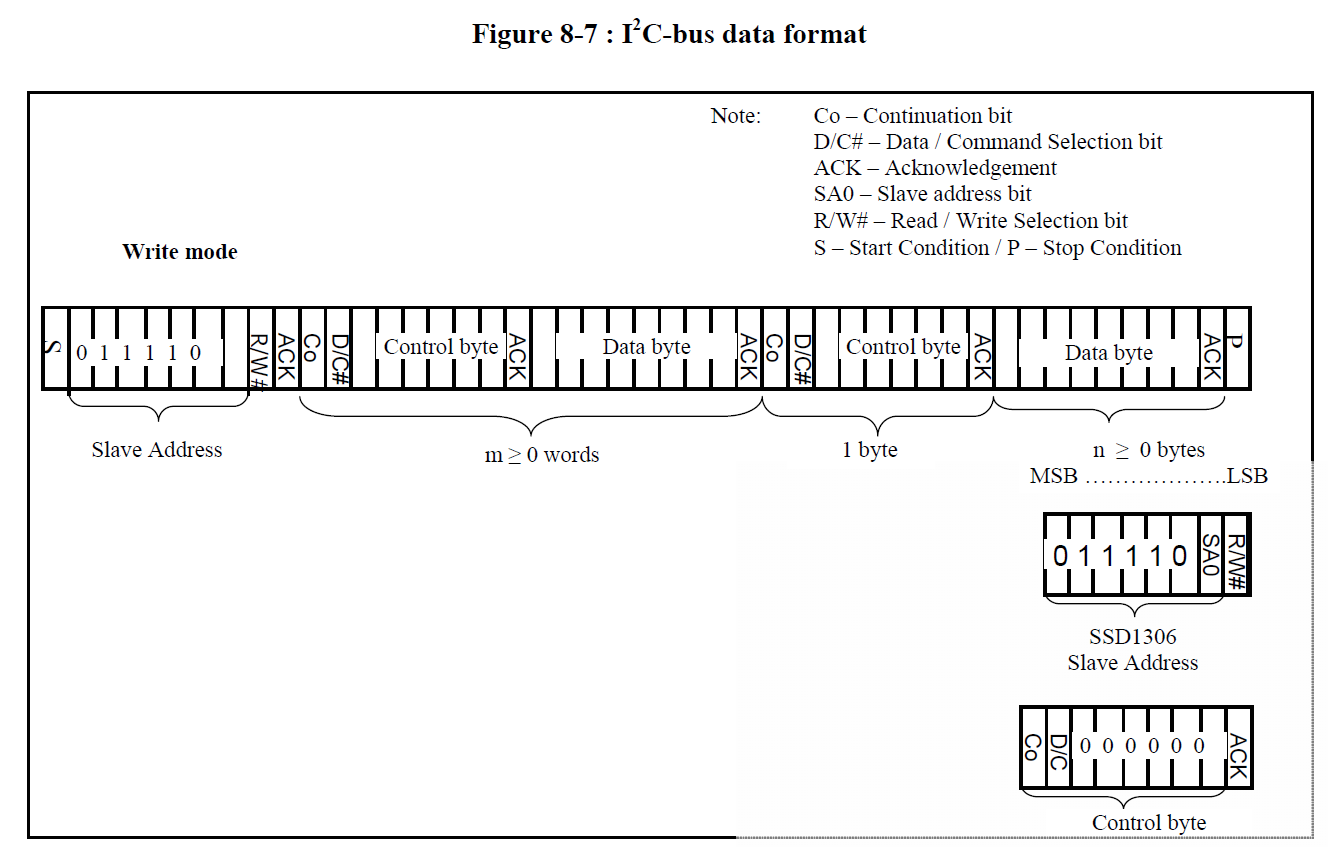
- This library works with the display modules that use the I2C protocol. This is important to know since there are other similar displays that use the same SSD1306 controller but communicate over the SPI interface. In that case, our library will not work. We use, in most cases, the modules with 4 pins – GND, Vcc, SCL, SDA.
- Although using the I2C interface, our SSD1306xLED library does not implement the I2C protocol but just a subset of it enough to accomplish the task of sending commands and data to the display. This comes with 2 great advantages: (1) it is super fast; (2) is super small – more details about those characteristics will be outlined below.
The library is, of course, open source and all the software is available at https://bitbucket.org/tinusaur/ssd1306xled/
The I2CSW sub-library
This is a small sub-library that implements a subset of the I2C protocols that is necessary to send some commands and data out. I2CSW stands for “I2C Simple Writer” and as its name implies it only writes out.
There are 2 macros to sent the SCL and SDA wires to high and to low, or, or 1 and 0.
— I2CSW_HIGH(PORT)
— I2CSW_LOW(PORT)
Then, there are 3 low-level functions:
— void i2csw_start(void);
— void i2csw_stop(void);
— void i2csw_byte(uint8_t byte);
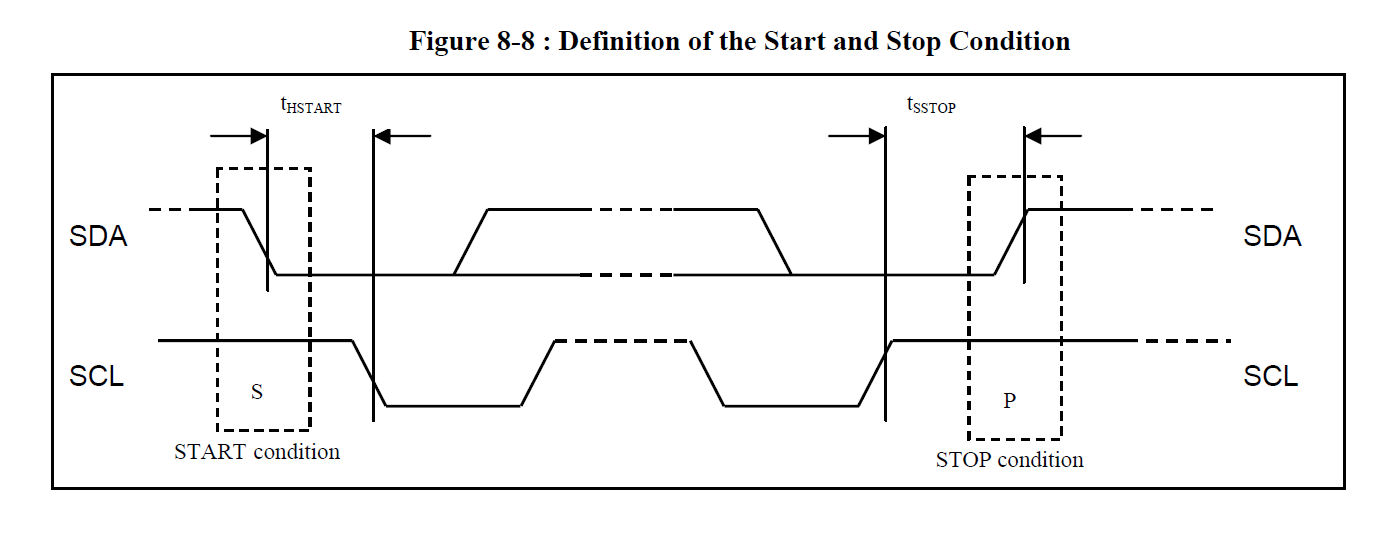
The i2csw_start function sets the SCL and SDA pins as output and the “start” condition. In other words, it lets the devices connected to the microcontroller know that we are about to send something out.
The i2csw_stop function sets the “stop” condition. This indicates that we have finished with sending the data. It also set the SDA pin as input so it won’t keep the SDA line at HIGH all the time.
The i2csw_byte function sends one byte of data out. It is used to send commands and data to the I2C devices – the display in our case.
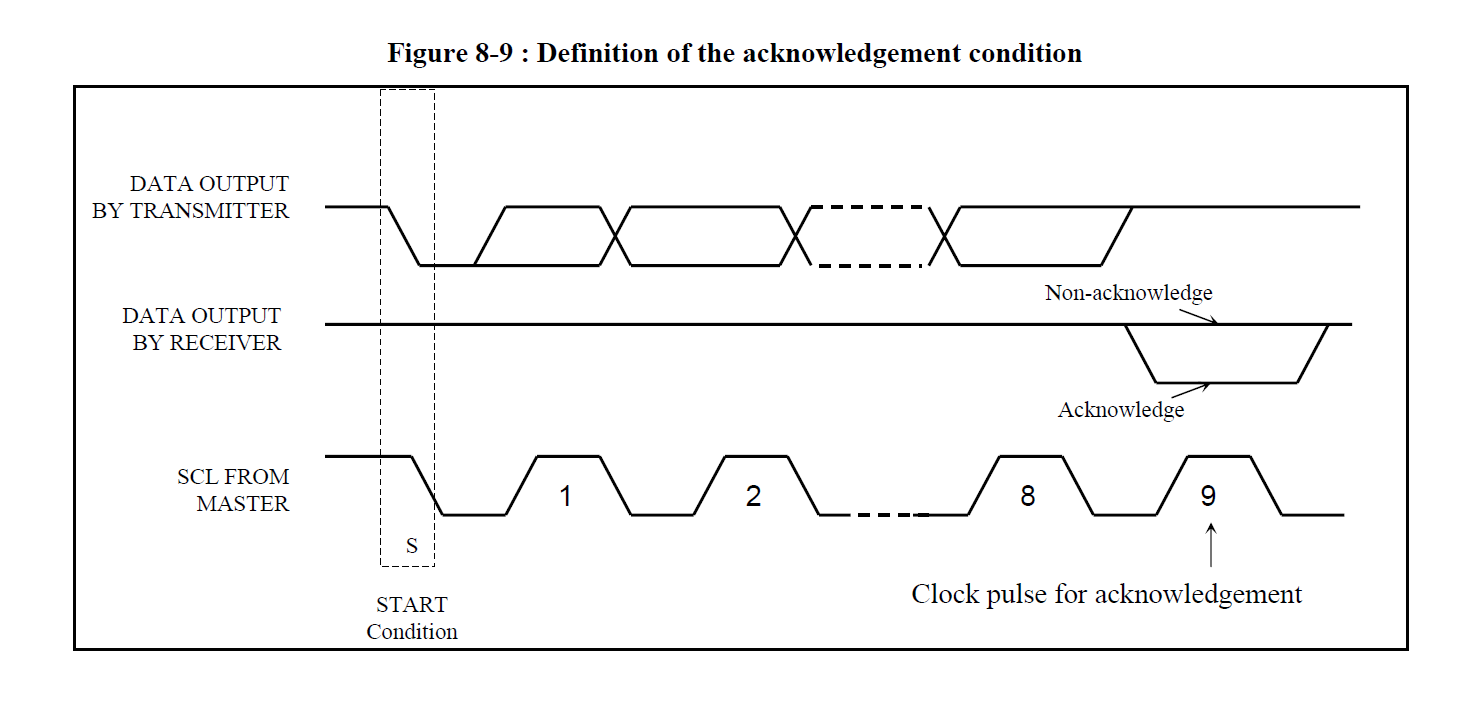
NOTE: The I2CSW library does not handle the acknowledgment condition.
The ssd1306 core functions
There are 4 core functions in the library at the moment:
— void ssd1306_start_command(void);
— void ssd1306_start_data(void);
— void ssd1306_data_byte(uint8_t);
— void ssd1306_stop(void);
The ssd1306_start_command function indicates to the connected I2C devices that we’re about to send commands. This is used to configure the controller o to set some parameters such as the current position on the display.
The ssd1306_start_data function indicates to the connected I2C devices that we’re about to send some data. This is used to send some data to the display controller – like bitmaps or text.
The ssd1306_data_byte function sends 2 bytes of data to the display controller. That is used for both commands and data.
The ssd1306_stop function indicates that we have finished transmitting data.
The ssd1306 supplementary functions
These are convenience functions:
— void ssd1306_init(void);
— void ssd1306_setpos(uint8_t x, uint8_t y);
— void ssd1306_fill4(uint8_t, uint8_t, uint8_t, uint8_t);
The ssd1306_init function sends a sequence of commands that will initialize the display controller so it will work the way we expect.
The ssd1306_setpos function sets the current position on the display. Sending data after this command will display it at that position.
From the documentation:
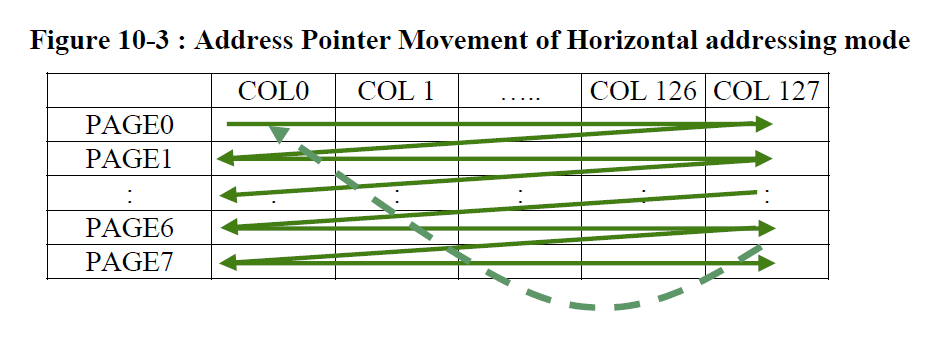
Horizontal addressing mode (A[1:0]=00b)
In horizontal addressing mode, after the display RAM is read/written, the column address pointer is increased automatically by 1. If the column address pointer reaches column end address, the column address pointer is reset to column start address and page address pointer is increased by 1. The sequence of movement of the page and column address point for horizontal addressing mode is shown in Figure 10-3. When both column and page address pointers reach the end address, the pointers are reset to column start address and page start address (Dotted line in Figure 10-3.)
Solomon Systech Apr 2008 P 42/59 Rev 1.1 SSD1306
The ssd1306_fill4 function fills out the screen with the 4 bytes specified as parameters. The reason for 4 bytes is that it is convenient for filling out with patterns.
There are 3 other functions derived from the ssd1306_fill4 function:
— ssd1306_clear() – clears the screen, i.e. fills it out with “0”.
— ssd1306_fill(p) – fills the display with the specified byte.
— ssd1306_fill2(p1, p2) – fills the display with the 2 specified bytes.
The testing scripts demonstrate the purpose and usage of those functions.
The testing in the “ssd1306xled_test1” folder
Source code at https://bitbucket.org/tinusaur/ssd1306xled/src/default/ssd1306xled_test1/main.c
This testing script demonstrates the use of the functions in the library.
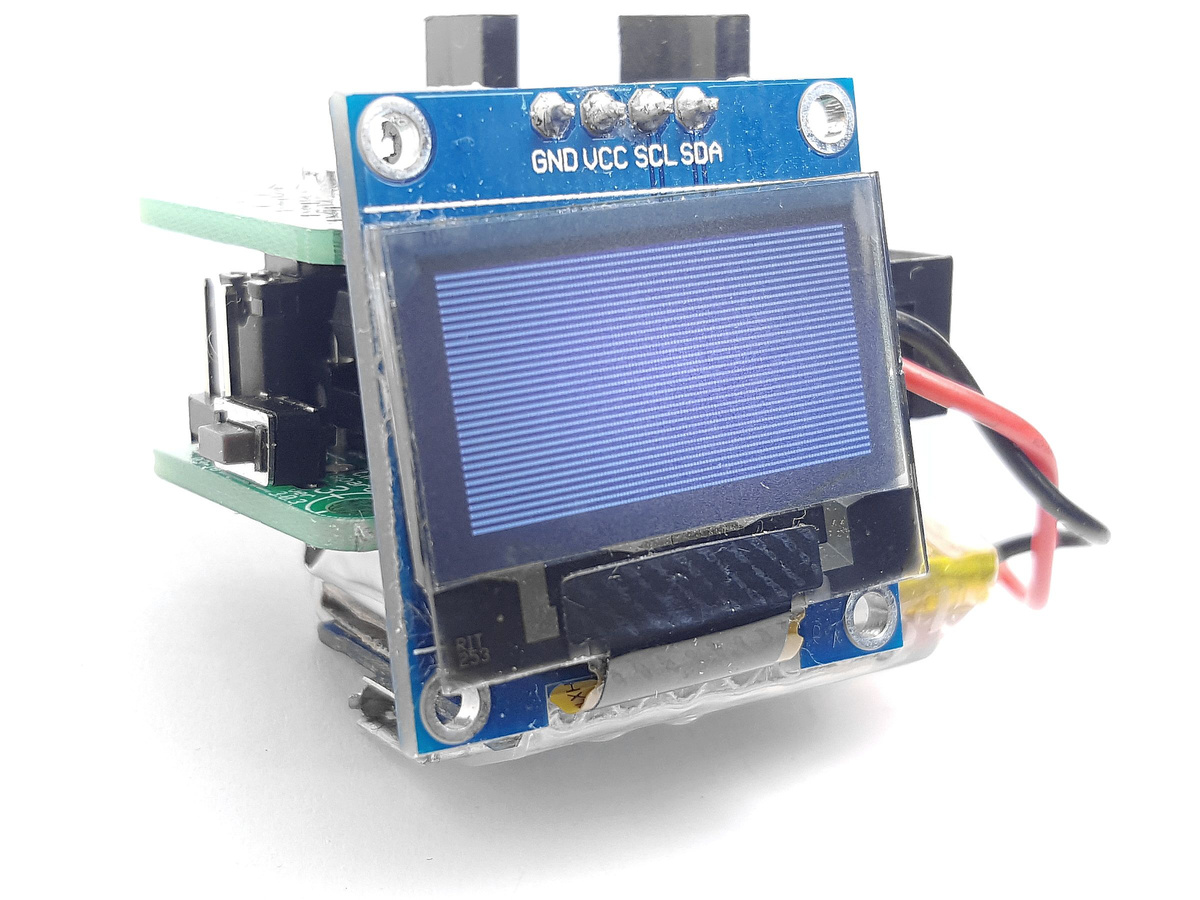
The first section fills out the screen with random values using a Linear congruential generator.

The second section fills out the screen with a sequential number that creates some patterns on the screen.
The next section fills out the screen line by line.
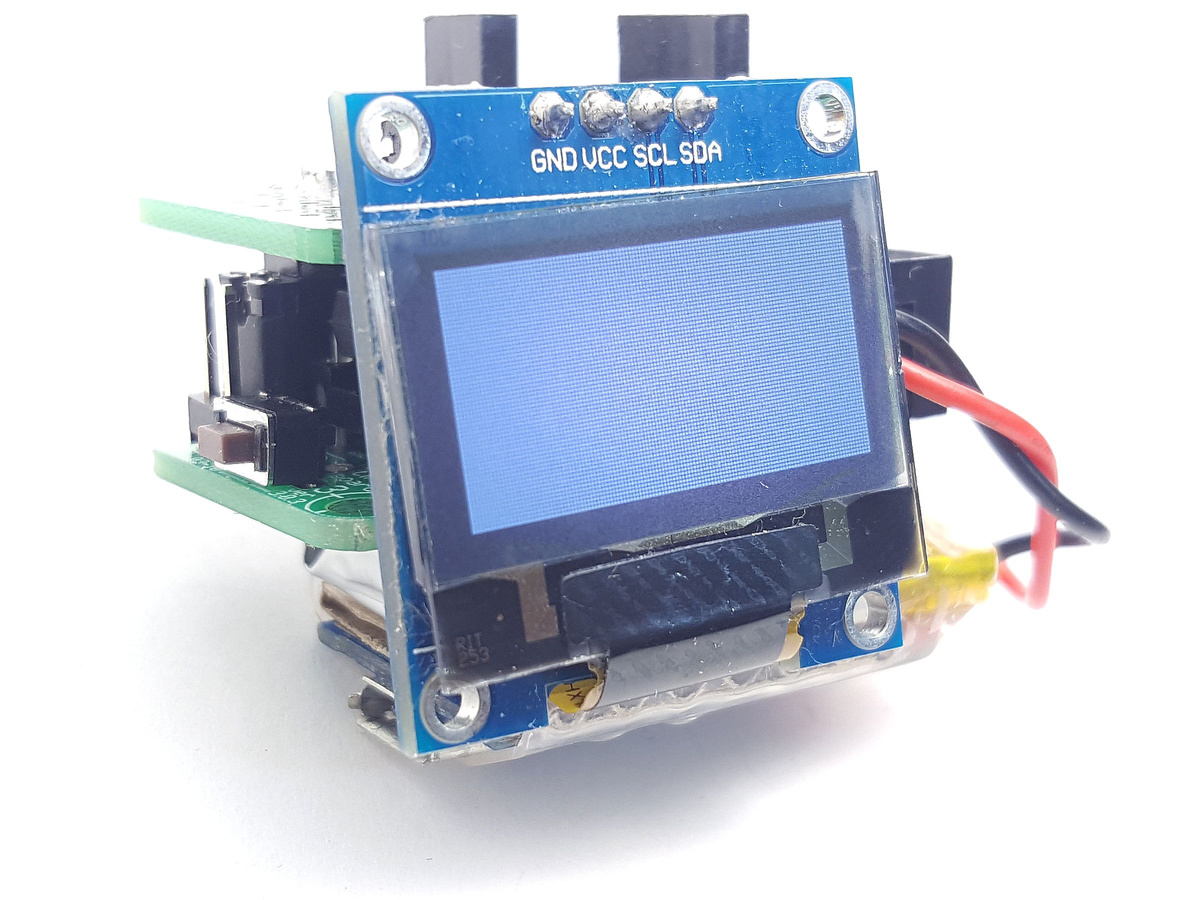
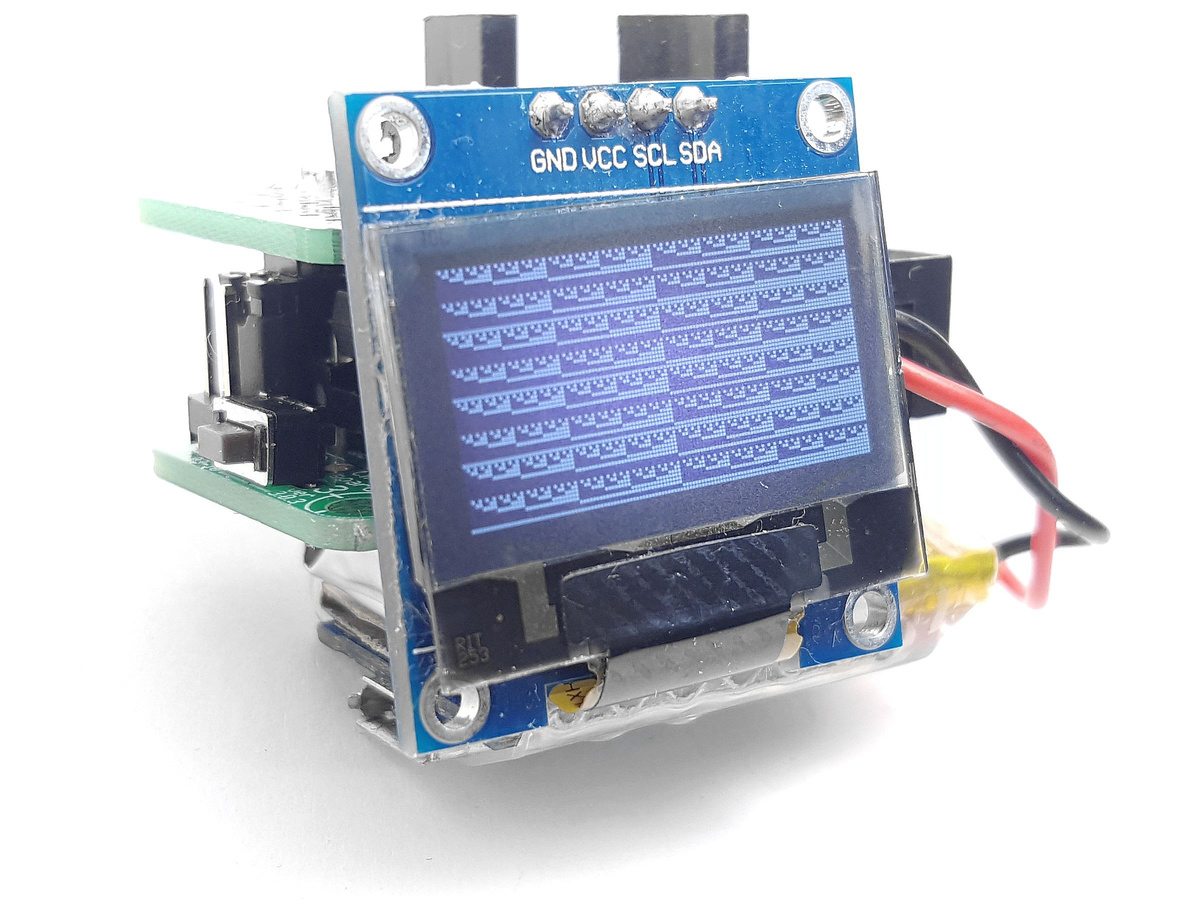
The last section fills out the screen with various patterns.
SSD1306 Library SSD1306xLED Testing Script 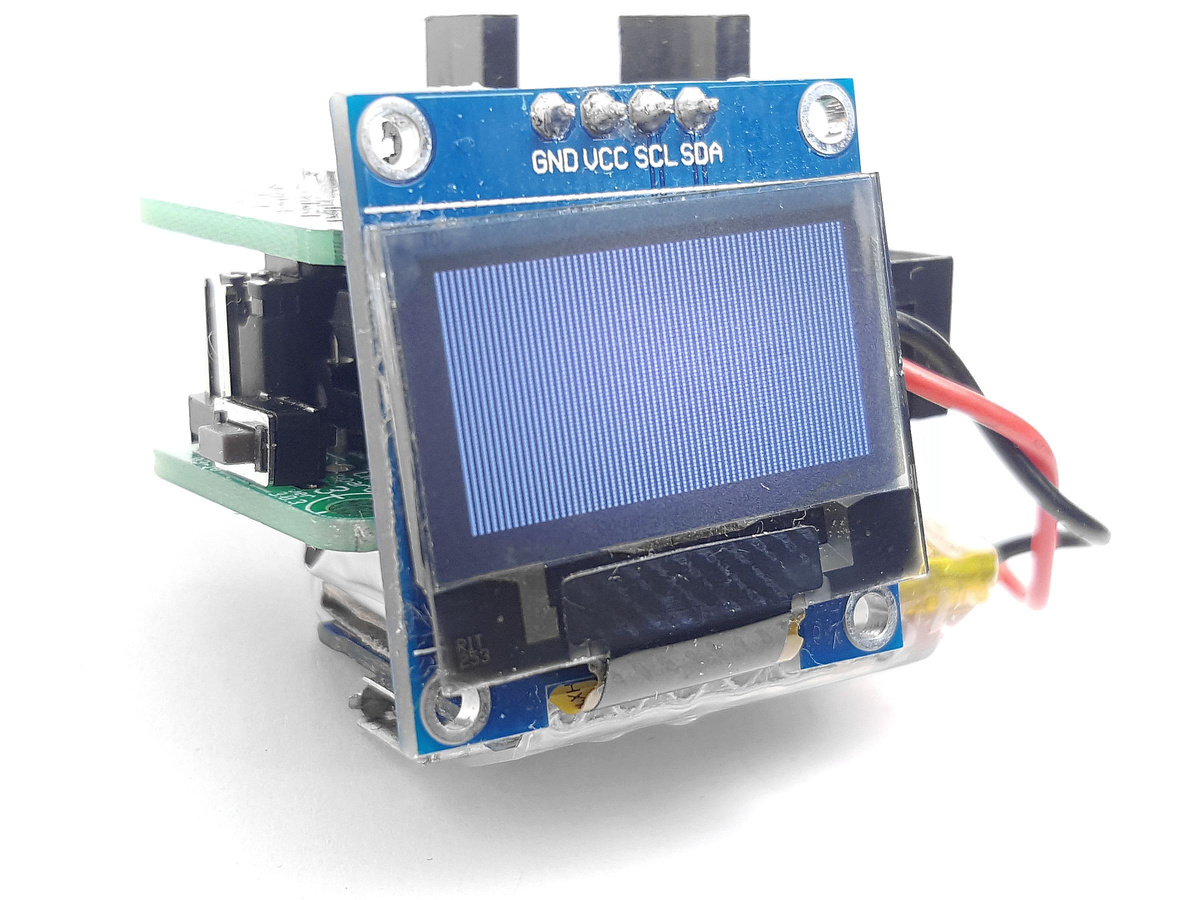
SSD1306 Library SSD1306xLED Testing Script 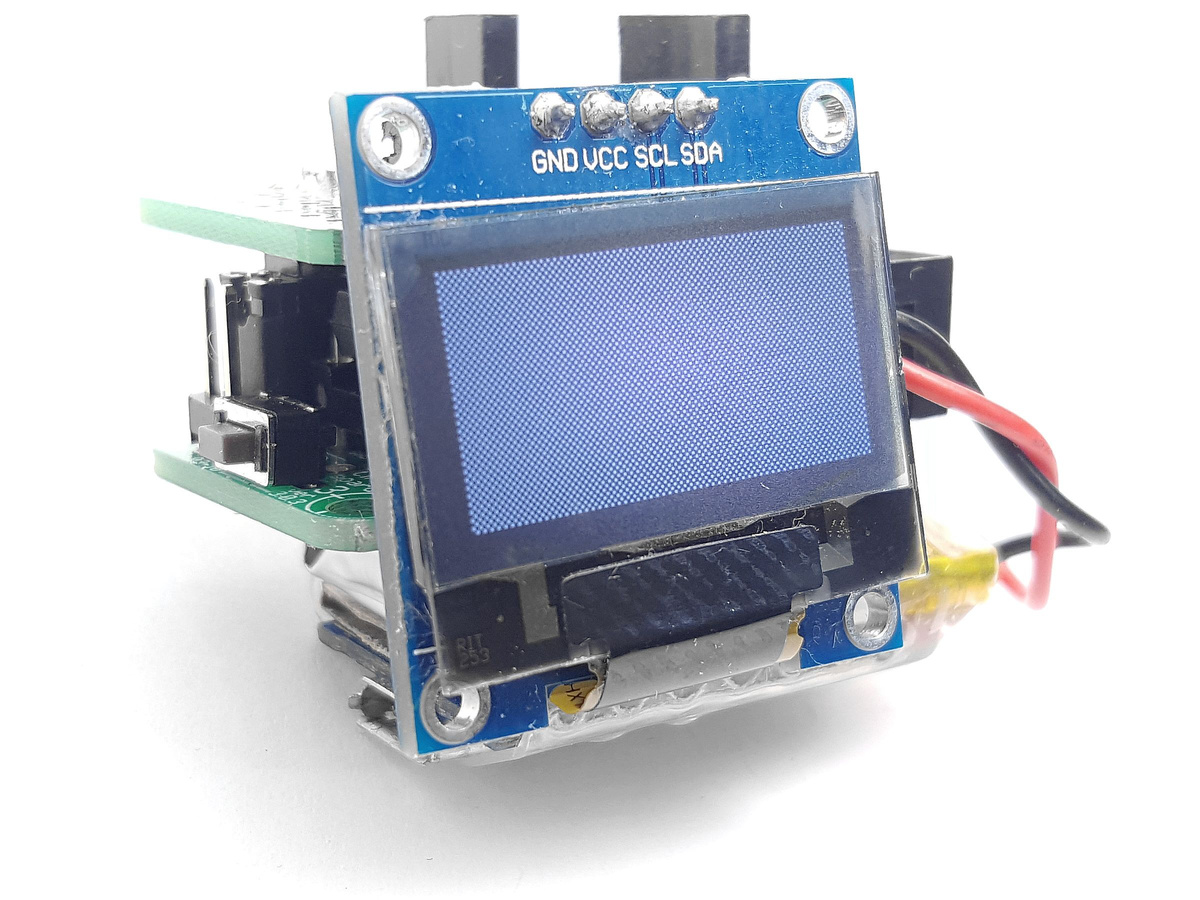
SSD1306 Library SSD1306xLED Testing Script 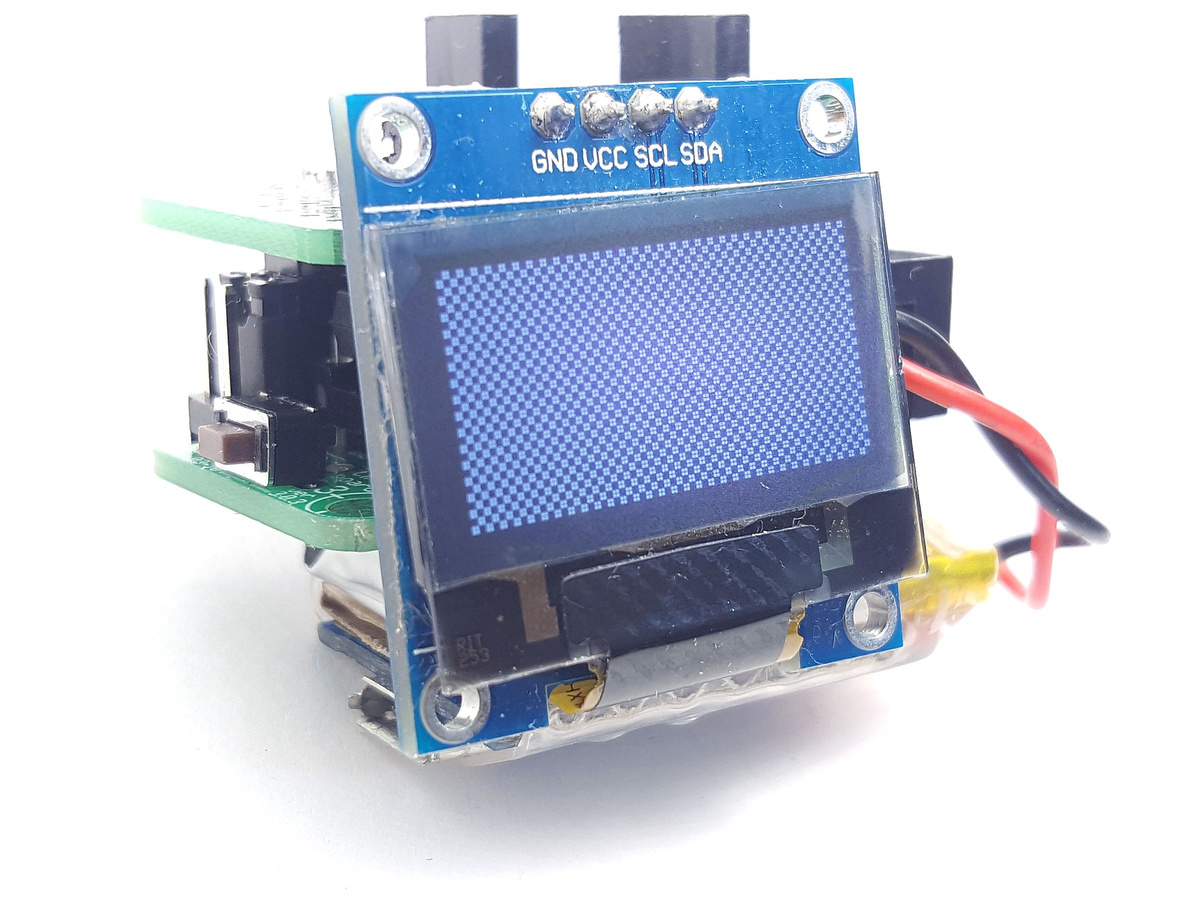
SSD1306 Library SSD1306xLED Testing Script 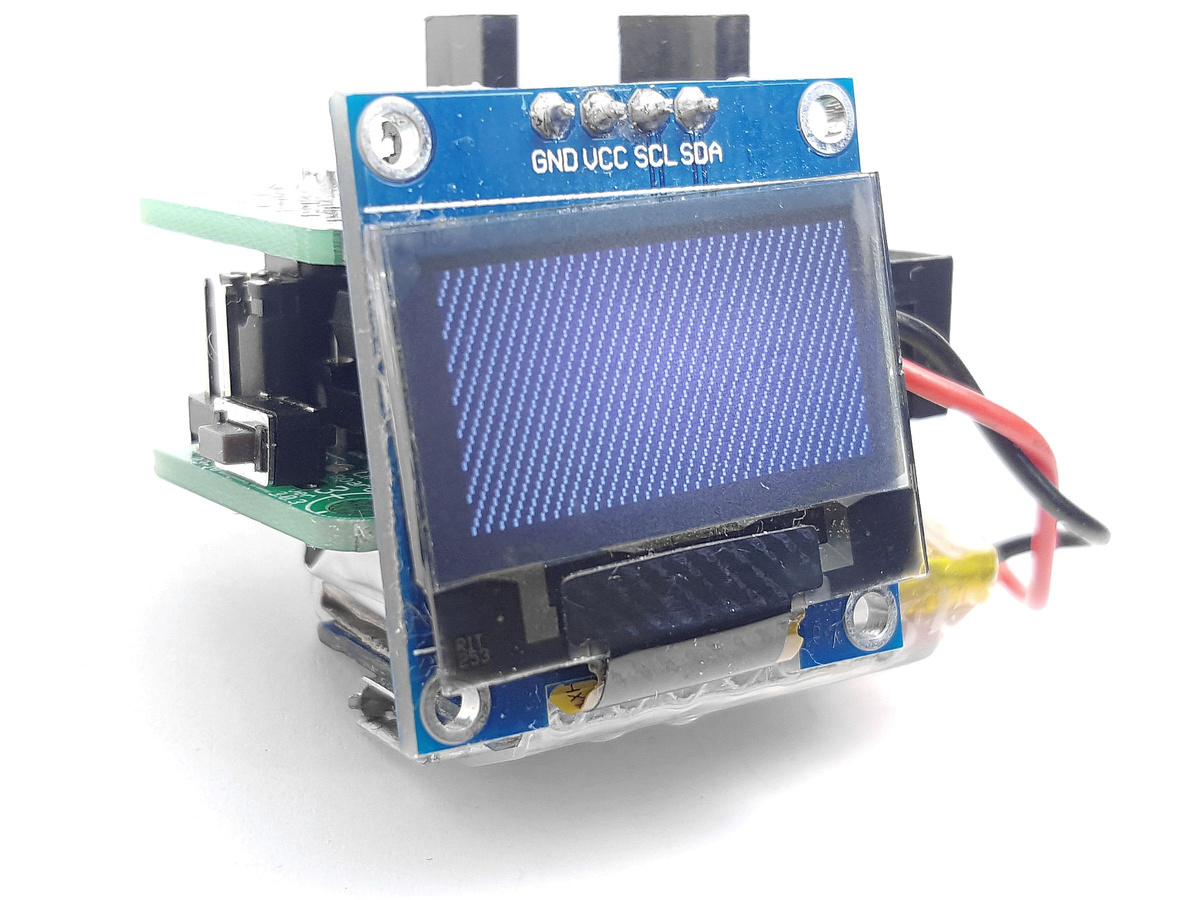
SSD1306 Library SSD1306xLED Testing Script 
SSD1306 Library SSD1306xLED Testing Script
More functions …
There are more functions in the SSD1306xLED library such as for printing text and numbers on the screen and drawing images but that will be subject of another article.
Please, share your thoughts!
Hi there! Looks like this code depends on CPU clock. I try to run it on Digispark (ATTiny85) 16.5MHz and it doesn’t work. Probably, because of SSD1306 IC low speed and the speed of execution of the code too high. Is there suggestion how to resolve this problem without CPU clock correction?
Hi Dmitry, I don’t have a Digispark to test it right now.
Do you get anything on the display, or it is not lighting up at all?
If you, by any chance, have one of those cheap 8-channel logic analyzers you could probably check the output to see if the signals are valid I2C.
Could you please share the code here?
I’d like to look at it and see if I can easily try it when I’m back home. I’m sure I have some Digispark boards there.